Wednesday, July 27, 2011

Pepperoni Bread

My Pre-Op appointment yesterday went good.  I was very happy to find out that I won't be in a cast and just a heavy-duty brace.  Hopefully this means that after this week I can return to baking and keep you guys entertained - because let's be honest, me baking with a brace after surgery, something is bound to go wrong.  So before I go off to the hospital for what I hope is my last surgery in this never ending saga, I wanted to put up my last post for the week.  I hope to have a great remainder of the week, and even celebrate my birthday tomorrow as well, and get back into the kitchen sometime next week. 

When one of my cousins was down for a visit she was talking about Pepperoni Bread and ever since then Ween has been asking for me to make it.  So as part of my final day of baking for a while, I made her request.  I even made the dough - which is amazing. It's really easy to make pizza dough.  And now that I've made my own, I will never go back to store bought.  Plus whatever you don't use you can wrap and freeze.  It's good in a freezer for up to 2 months. 

First up, I made the dough.  It came together quickly and the thing that takes the most time is for it to raise.  But once it's doubled in size, you get to roll it out into 2 portions and then make them into balls and let them rest again for up to 30 minutes.  Then it finally comes - time to roll out the dough and make the bread!  And seriously, this couldn't be any easier.  You can use store bought dough if you like or if you're short on time.  Once rolled out to the proper shape, you get to fill it up with the toppings. 

Pepperoni and cheese
A line of ingredients down the middle, then you fold over 1/3 of the dough and cover the top of that with more ingredients.

looking good
Then fold over the top and tuck the ends underneath.  Repeat with other ball of dough if you are making 2 - and let's face it, this is that good that you will want to make both.  Once both are ready to go place on a pan and make 4-5 slits along the top to allow bread to vent while baking.  Brush some melted butter over the tops......

all ready to go
.....and then into the oven they go!  Shortly afterwards they come out all golden brown.

why hello
Let it cool a little and then you can eat this wonderfulness of bread.

YUM!
I mean really, you can fill the middle with whatever you want - it will work with anything.  Quick and easy bread that is sure to be a hit with everyone.  Let's just say when I told Ween what I made her she got really excited about it and couldn't wait to get home to try some of it. 

Pizza Dough

1/2 cup warm water
1 envelope instant yeast
1 1/4 cups room temperature water
2 tbsp extra virgin olive oil
4 cups bread flour, plus more for dusting
1 1/2 tsp salt
olive oil or non-stick cooking spray for greasing the bowl

  1. Measure the warm water into a 2 cup liquid measuring cup.  Sprinkle in the yeast and let stand until the yeast dissolves and swells, about 5 minutes.  Add the room temperature water and oil and stir to combine.
  2. Place the flour and salt in the bowl of a stand mixer fitted with the paddle attachment.  Briefly combine the dry ingredients at low speed.  Slowly add the liquid ingredients and continue to mix at low speed until a cohesive mass forms.  Stop the mixer and replace the paddle with the dough hook.  Knead until the dough is smooth and elastic, about 5 minutes.  Form the dough into a ball, put it in a deep oiled bowl, and cover with plastic wrap.  Let rise until doubled in size, about 1 1/2 - 2 hours.  Press the dough to deflate it.
  3. Turn the dough out onto a lightly floured work surface.  Divide the dough into two equal pieces.  Form both pieces of dough into smooth, round balls and cover with a damp cloth.  Let the dough relax for at least 10 minutes but no more than 30 minutes.
  4. Use both halves of the dough or wrap one half tightly in plastic wrap and place in plastic zipper bag.  Freeze for up to 2 months.

Pepperoni Bread

shredded mozzarella cheese
sliced pepperoni
1 tbsp melted butter

  1. Preheat oven to 500 degrees.
  2. Dust a clean work surface with flour.  Roll out dough into a long oblong shape, about 12-14" long and about 8" wide.
  3. Visually divide the dough into thirds long-ways.  Down the center third of the dough sprinkle the cheese and pepperoni.  Fold one side of the exposed dough over the stuffed center.  Repeat a layer with the remaining cheese and pepperoni on top of the dough half that covered the first layer.  Fold the remaining 1/3 of the dough over the stuffed area and wrap it under the log.  Wrap the ends under the log as well.
  4. Place dough on a pan lined with parchment paper. With a sharp knife, make 4-5 slits on the diagonal into the top of the dough to allow the bread to vent while it cooks.  Using a pastry brush, brush melted butter over the top of the bread and down the sides.  
  5. Place pan into the oven and bake for 12-14 minutes until nicely browned.  Remove from oven and allow to cool for 5 minutes.  Cut into pieces. 


Tuesday, July 26, 2011

Chocolate Crackle Cookies

It's finally come - tomorrow is my surgery.  And today is my Pre-Op appointment in Boston to go over what the surgery is about and everything that will be done to my wrist to make me better.  So I thought that yesterday would be my final day of baking for a while and why not make my sisters things that they have been asking me for.  Immediately I knew what I would make for Heays - her all time favorite cookie....ever.  I found this one years ago, back when Martha Stewart was aired on the Food Network.  I printed this out and made them, and the love affair began.  So did my tinkering with recipes.  I've now got this recipe to where I love it - and have worked all the short cuts out as well. 

The recipe itself for these Chocolate Crackle Cookies is a little overwhelming when you read it the first time.  But trust me, it's really easy.  And I'm going to share my short cuts with you to make it even easier.  The dough part stays the same - all the short cuts come after.  Once the dough is ready - don't portion it out into plastic wrap.  Trust me - you are just adding way too many steps.  Put it in a large bowl and cover it with plastic wrap and put it in the fridge.  The longer you let it sit in there, the better the cookies will be.  I usually let them sit in there over night, but 4 hours is what they got yesterday and that is plenty of time.  You also don't need to roll them out into individual logs and put them in plastic wrap.   Waste of time and effort.  Just keep it in the bowl as a solid unit.....took me years of making these cookies, cursing at them every time because they were so labor intensive, and then once my hand got hurt I couldn't make them at all - too much and too hard for me.  So, the important thing to learn here is to skip all the rolling out into plastic wrap and just leave it in a bowl to chill. 

Once you are ready to bake - all you need to do is take a spoon and scoop out the dough, roll it into a ball and then roll that ball into sugar and then confectioners sugar.  This is much easier than cutting the roll of dough that you would of made and then turning that into a ball and then rolling it into the sugars.  I'm saving you loads of time here...trust me :)  These don't expand a lot so you can pack a lot on the sheets at once.

that's right...15 on one sheet :)

While baking, they crack and you can see the chocolate underneath - and your house will smell amazing. 

so pretty
Heays got home from work and I told her she had a present for her in the cookie jar.  Her face was priceless when she opened the lid and saw her favorite cookies there.  Needless to say these don't last long - they are highly addicting. 

Friday, July 22, 2011

Chocolate Truffles

It's too hot to even think about turning my oven on - so why not have an easy no bake recipe for you guys?  Truffles can seem like a daunting thing, but in reality they are extremely easy.  It's good ingredients that make them so good, not the time and effort.  This is the simplest recipe I have ever seen for truffles (I have one where you freeze it like 3 times before you get to the end) and it's been my go-to recipe for years.  It works well in all times of the year, my only suggestion is that if it's hot/humid out that you put it in the fridge to set up - it wont set if you leave it out on the counter to set and it's hot. 

All you need is a couple of things for this - some chocolate, heavy cream, vanilla extract and whatever you want to coat your truffles in.  I prefer dark chocolate candy coating, but rolling them in confectioners sugar or cocoa powder is great too.  It's a personal preference so go crazy with this part.

This is how easy this recipe is.  I buy the chocolate in chips - that way I don't have to waste time chopping it all up into tiny pieces.  I toss the chips in a heatproof bowl and then heat up the cream on the stove until it just boils.  Pour the hot cream over the chocolate and let it melt a little and then start to stir it.  Once it's all smooth, add the vanilla.  Then I pour it into a glass baking dish - don't use a bowl, it will take hours for it to set if you do.


mmm....look at that pretty sight
 You want to use something along the lines of a 13x9 baking dish - much easier.  Let it set for an hour and then comes the fun part of rolling them out.  (If you put it in the fridge to set, let it sit out for 5-10 minutes before you start to roll them out).  The best part of making truffles is that they don't have to be the prettiest things - they can be any size or shape that you want.  You can even fill candy molds with these if you're feeling adventurous.  Once all rolled out, time to coat them in whatever you want. 

all rolled and coated in chocolate
 Then you're done, time to eat. 

yum
I brought some in to my favorite taste testers, and one of them was so exciting.  I have been talking about my truffles with her for a while now and kept promising her some.  I got the biggest hug and I told her to make sure that she got to take some home. 

Chocolate Truffles
about 60 truffles

1/2 pound good bittersweet chocolate
1/2 pound good semisweet chocolate
1 cup heavy cream
1/2 tsp vanilla extract
cocoa powder, confectioners sugar, candy coating to coat truffles in

  1. Chop the chocolate finely with a sharp knife (if you're using chips, pour them into a bowl and you're done).  Place them in a heat-proof mixing bowl.
  2. Heat the cream in a small saucepan until it just boils.  Turn off the heat and all the cream to sit for 20 seconds.  Pour the cream through a fine-meshed sieve into the bowl with chocolate.  Wish a wire whisk, slowly stir the cream and chocolates together until the chocolate is completely melted.  Whisk in the vanilla extract.  Set aside at room temperature for 1 hour.  *If it's too hot - stick it in the fridge to set*
  3. With 2 teaspoons, spoon round balls of the chocolate mixture onto a baking sheet lined with parchment paper.  Roll each ball of chocolate in your hands to roughly make it round.  Roll in confectioners sugar, cocoa powder - whatever you want to use. 
These will keep refrigerated for weeks, but serve them at room temperature. 

Wednesday, July 20, 2011

Chocolate Peanut Butter Cup Cookies

I'm going to start this post off with a giant thank you to my favorite taste testers - you know who you are.  Tuesday is treat day for you and I found this recipe and knew you guys would love it.  I mean who wouldn't love a chocolate cookie with mini peanut butter cups in them?!  And as one of you puts it, chocolate and peanut butter are "2 things that just go together".  :) 

I read over the recipe and it seemed easy enough - all I needed was a bag of mini peanut butter cups.  I changed a couple of things up in the recipe and was ready to get going with it.  Make sure that when you add in the peanut butter cups to stir them in by hand.  If you do it with a mixer, a lot of them get broken.  Clearly, I used the mixer - they came out just fine - a little crushed here and there.  But if that doesn't matter to you then the mixer works just fine.  These don't expand a lot during the baking time, so if you want to try to squeeze more on a sheet at a time you can.  Scoop out the dough........

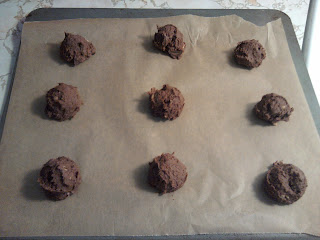
ready to bake :)
.....bake them off and 7-9 minutes later you have these. 

yum
Let me tell you - these smell so good while baking.  It even says in the directions to "bake them until they're set and you can smell chocolate".  It's true - once you smell it, they are done. 

I happily handed these out for Tuesday Treat day.  Needless to say they went over very well. 

Chocolate Peanut Butter Cup Cookies
makes about 30 cookies

1 1/2 cups all purpose flour
1/2 cup cocoa powder
1/2 tsp baking soda
1/4 tsp salt
1/2 cup granulated sugar
1/2 cup brown sugar
1/2 cup butter, room temperature
1 tsp vanilla extract
1 large egg
2 tbsp milk
1 1/2 cups (9 oz) mini peanut butter cups

  1. Preheat oven to 375 degrees.  Line cookie sheets with parchment paper or Silpats.  In a medium sized bowl, whisk together flour, cocoa powder, baking soda and salt.  Set aside.
  2. In a large bowl, beat together both sugars and butter until light and fluffy.  Beat in the vanilla, egg and milk.  Then add in dry ingredients.  Stir in the peanut butter cups.
  3. Scoop rounded tablespoonfuls of dough onto prepared cookie sheets.  Bake cookies for 7-9 minutes, rotating sheets halfway through, until they're set and you can smell chocolate.  Remove them from the oven and cool on cooling rack.

Monday, July 18, 2011

Toffee Chocolate Chip Cookies

I had an extra bag of Heath Bar chips laying around (I wasn't sure how much the cupcakes would of needed so I bought 2 bags just to be safe) and I was thinking what could I do with them?  Why not make some cookies.  Quick and easy, everyone loves cookies.  My Dad is a giant cookie fan, and he loves toffee so this was a no brainer.  And I could eat a little cookie dough as I was making cookies :) 


i <3 cookie dough

I was debating with myself whether I should have just all toffee chips or toffee chips and chocolate chips.  I ended up with using both chips.  They turned out really good with both.  I scooped them out and into the oven they went.  Soon I had cooling trays full of cookies. 

mmm...cookie
Once they were mostly cooled, I packed some up and went to my parents house to sit by the pool.  My dad was so excited.  Needless to say the cookies didn't last long.  I had also brought him some of the Heath Bar Cupcakes - so he was extremely happy. 

Toffee Chocolate Chip Cookies

2 1/4 cups all purpose flour
1 tsp baking soda
1 tsp salt
2 sticks butter, room temp
3/4 cup packed brown sugar
3/4 cup sugar
1 tsp vanilla extract
2 eggs
1 cup chocolate chips
1 cup Heath Bar toffee chips

  1. Preheat oven to 375 degrees. Line baking sheets with parchment paper or Silpats. In a bowl whisk together flour, baking soda and salt.  Set aside. 
  2. In a large bowl, cream together butter and both sugars until light and fluffy.  Add eggs and vanilla extract.  Slowly add dry ingredients until combined.  Add both chips and stir until combined.
  3. Scoop out 2" of dough onto prepared cookie sheets.  Bake, rotating sheets halfway through, 9-11 minutes, or until cookie is golden brown.  Transfer to wire racks to cool. 

Friday, July 15, 2011

Heath Bar Cupcakes

I saw this recipe last month and printed it out and set it aside to make later that week.  A month and a half later I finally got around to it.  I got Heath Bar Cupcakes from My Baking Addiction (where else right?).  The whole site is great - easy short cuts for those of you who aren't fans of baking from scratch all the time - it's a lot of doctored box cake mix recipes - but you could always use your favorite from scratch recipe for the cupcake part - I do it all the time for things. 

The batter comes together real easy, and before you know it they are in and out of the oven.  Then comes the fun part - decorating these things.  I love frostings - especially good ones.  If it's not good frosting on a cake/cupcake, I'm not going to eat it.   Wrong, I know - but I've got high standards of baked goods after all these years. 

i see Heath bits popping out

Once frosted, time for the ganache part.  I'm not a fan of the ganache that she uses - it's the same for the Rolo Cupcakes and it wasn't really a ganache, well it was but I've never seen one with honey in it.  So I decided to use something that I love to kick these bad boys up a notch - use the filling that I use for Chocolate Shortbreads - awesome idea.   It's thicker and better tasting. And it didn't run all over the place - stayed on top of the cupcake :)  Then top it off with some Heath Bar bits and you're good to go. 

yumm
After they firmed up in the fridge for a while, off I went to play treat fairy to some of my favorite taste testers.  The look on one of their faces when I went in to give them treats was priceless....she was very excited about them.  I also got to bring some to one of my best friends when I had our monthly dinner with him last night - really the only way we get to see each other, and it's always a good time.  And he likes it because I always bring him treats to try.  Last time I had brought him Cookie Dough Cupcakes and he had devoured it - in like less than a minute.  So we said that we would tape him eating a cupcake next time - but all we got was a photo - I promise a video will be put up of him one day.  But he is a huge fan of these cupcakes....
happy camper
....and kept talking about the cookie dough ones.  So print it out and bake away!! This is an easy cupcake and very delicious :)

Wednesday, July 13, 2011

Cinnamon Raisin Bread x2

It's hot and humid here, and when I woke up yesterday one of the first thoughts I had was 'It's perfect weather for breadmaking'.  Last time I made bread it didn't turn out so great.  It didn't proof right, well one loaf did and the other didn't.  Not exactly sure where I went wrong with it.  So I was in the mood to make bread and it was going to work this time.  I get to work making it and start to wait for it to work it's magic and rise.  I go through all the steps and get to the last one where you put it in the loaf pans to rise one more time before you bake it.  And wouldn't you know it that it happened again - one loaf raised (a little - not like it should of) and the other just stayed the same.  FAIL. 

Frustrated, I threw them all away.  I didn't want to look at bread for a while, let alone think about it.  But it was eating away at me.  And while I was getting dinner ready, I decided that once dinner was in the oven, I was going to make bread - and it was going to be amazing.  I was going to show yeast, yet again, who was boss.  And I won :)  I was extremely happy when the dough had proofed really well on the first round - better than it had in my earlier batch.  I knew there wouldn't be any issues this time.  I happily let it keep proofing while my sisters and I watched some tv.  Once I put the bread into the oven, they kept saying that it smelled so good and that they wanted a piece of it.  And this was coming from Ween, she doesn't eat cinnamon raisin bread.  Once they were done, I took them out to cool.  I was so happy.  They baked up nicely, a little too dark - I really need to get my oven checked.

so pretty
I went to bed happy that they turned out so well, and excited for the morning so I could eat a piece for breakfast.  When I got up, I came into the kitchen and cut into one of these bad boys.

delicious
I popped 2 pieces into the toaster and made some coffee.....and it was amazing.  I love any bread, english muffin, any morning thing that has cinnamon and raisins in it.  And now that I feel like I have mastered this I will be making it all the time.  And I really need to get our oven checked out by our landlord.  It doesn't act up all the time, but it's starting to go.  :(

Monday, July 11, 2011

Lemon Squares

I had a request from a good friend, who is totally my partner in crime when it comes to shopping for shoes and clothes, for Lemon Squares.  I said absolutely and that I will bring some to her to our upcoming ladies lunch/shopping date.  Of course I had to do a dry run of these before I brought them to her.  I took out my Martha Stewart's Cookies Cookbook and looked it over - seemed simple enough....and it is. 

I looked at the crust for it and thought I would be inventive and go for a Nilla Wafer crust.  So instead of using flour, I used crushed up Nilla Wafers - I thought it came out pretty good.  You could also use graham crackers if you would like, I think they would work well in these as well.  But other than the switch of Nilla Wafers for flour, I stuck to the recipe as it was. 

I made the crust and stuck it into the freezer to firm up before it went into the oven.  Once ready, I baked it off.  It did come out a dark golden brown - and that's due to the Nilla Wafers, so if you use flour it won't be as dark as this.

golden brown crust
While the crust was in the oven baking, I made the filling - really easy too.  Once the crust was out of the oven, I poured it over the crust and put it back into the oven.  Once the edges are light brown and the center is set, it's time to pull it out.

yum
After a while, pull the corners of the parchment paper and pull it out of the pan to finish cooling completely.  Of course, it was heavier than I thought and it was too much weight for my bad hand and I kinda almost dropped it.  As a result of my boo boo, I ended up having a giant crack in the middle of the cake :(  But it was OK - I knew that I would get to cover it all with confectioner's sugar and it wouldn't be that bad of a mess.

Once they were cooled, I got out my flour sifter (great to use if you don't have a powder shaker) and went to town making it snow all over the top of the lemon squares.  Then I cut them all up and put them in my fancy Tupperware. 

oh yeah
Of course I tried one, so good.  And not overpowering in the lemon department.  My only complaint was that the bottoms were a little too buttery so I think when I make them again I'm going to change the butter amount to less and see what happens. 

Lemon Squares
makes about 2 dozen

Crust:
1 1/2 sticks of butter, frozen, plus more for dish
1 3/4 cups all-purpose flour
3/4 cup confectioner's sugar
3/4 tsp coarse salt

Filling:
4 large eggs, lightly beaten
1 1/3 cups granulated sugar
3 tbsp all-purpose flour
1/4 tsp coarse salt
3/4 cup fresh lemon juice
1/4 cup whole milk
Confectioner's Sugar for dusting

  1. Preheat oven to 350 degrees.  Butter a 9"x13" glass baking dish and line with parchment paper.
  2. Make crust:  Grate butter on a cheese grater with large holes; set aside.  Whisk together flour, confectioner's sugar and salt in a large bowl.  Add butter, stir with a wooden spoon until combined and mixture looks crumbly.
  3. Transfer mixture to prepared dish; press evenly onto bottom with your hands.  Freeze crust 15 minutes.  Bake until slightly golden, 16-18 minutes.  Leave oven on.
  4. Meanwhile, make filling:  Whisk together eggs, granulated sugar, flour and salt in a bowl until smooth.  Stir in lemon juice and milk.  Pour over hot crust.
  5. Reduce oven temperature to 325 degrees, and bake until filling is set and edges are slightly golden brown, about 18 minutes.  Let cool slightly on wire rack.  Lift out; let cool completely on a wire rack before cutting into 2" squares.  Dust with confectioner's sugar.  Can be refrigerated in airtight containers up to 2 days.  

Friday, July 8, 2011

Lemon Cake with Lemon Icing

Summer is here!! Yay!! So why not have some posts about summery baked goods?  I love cake or cookies with lemon in them and one of my very good friends said that his mom had an amazing recipe for lemon cake when I was talking about making some Lemon Squares.  I emailed his mom and she gave me the recipe - I'm a huge fan of it.  It's really easy and quick - and extremely delicious. 

I had gotten the recipe the night before, so I read it over and made a mental list of the supplies I would need to get.  The next morning off I went to the grocery store to get what I needed and then came home and got to baking. 

This literally comes together in seconds.  Add it all together and put it in the pan and off it goes into the oven.

mmm...cake
Clearly I'm having issues with my oven working properly.  I ended up turning down the temperature and taking it out early - but I don't think your cake should turn out this dark - maybe just a golden brown and not a dark tan.  Now comes the fun part - poking holes all over that bad boy while it's still warm with a fork.  Away I went stabbing the cake (gently of course) and then made the icing real quick......then I poured it all over the top.

not sure why I had a divot
I stuck the cake in the fridge and an hour later cut into it once it had cooled all the way.  She had told me that it was moist (and honestly who doesn't love a moist cake?) and was it ever!!  I ended up eating 2 pieces of it!  Then I packed some up and off I went to deliver some to my 3 favorite guy taste testers.  When I got there, one of them looked at what I brought and said "I can tell just by looking at these that it's going to be good".  Then he took a bite and said "Soo good".  Look at this.......

moist and delicious
.......doesn't it make you want some?!

Lemon Cake with Lemon Icing


Cake:
1 box yellow cake mix
1 package instant lemon pudding
4 eggs
3/4 cup vegetable oil
3/4 cup water

Preheat oven to 350 degrees.  Grease a 13"x9" pan.  Mix everything together in bowl until smooth.  Pour batter into greased pan and bake for 35 minutes or until cake tester inserted in center comes out clean. 

Icing:
1/3 cup lemon juice
2 cups confectioners sugar
2 tbsp melted butter
3 tbsp water

Whisk everything together until smooth.  Poke holes all over cake while still warm.  Pour icing all over cake. 

Keep cake in fridge for best flavor. 


Tuesday, July 5, 2011

Rolo Cupcakes

It was Rolo week on My Baking Addiction and when I saw this recipe for Rolo Cupcakes I knew I had to print it out and make them.  I had called my Dad earlier in the week and told him about them and he was very excited.  We had some more family coming down for the holiday weekend, so I knew at some point I would make them for everyone.  Friday came and company had arrived, but my mom had made a dessert so I said I would make the cupcakes for Sunday - my Dad was a little sad, said we could have both.  I told him Sunday would be the day for them.  Sunday came and I got to work.  This is similar to the Chocolate Chip Cookie Dough Cupcakes where there is something in the middle and on top.  I knew they would be a hit. 

Once everything was ready for the cupcakes, I scoop them out and put a frozen Rolo in the middle of each one. 

chocolate in chocolate :)
Then you cover them up with the remaining batter and bake away.  Once cooled, time for the caramel frosting.  Easy to make and very tasty.  I suggest making the chocolate ganache before you start with the frosting - it needs time to set up and thicken.  So make the ganache first and then make the frosting and ice the cupcakes - perfect timing. 

frosted and ready for ganache
Once frosted, drizzle the ganache over the tops.

looks good
Then you get to put a Rolo on top
oh yeah
I brought some out to my family once they were ready.  Huge hit.  Everyone loved them.  My Mom is a huge fan of the frosting - says that these cupcakes are her favorite.  My cousin's husband said that it was "the best thing to ever go into his mouth".  He had a few more that day before they left (he's a treat lover - more care packages will be sent their way).   

I love Rolo's so I will be making these again.  And my parents said I should make them again when AD and UD come down soon - and I totally will since UD has a love of Rolos like I do.  I mean look at this.......

delicious
........wouldn't you want to have one of these bad boys?! 

Friday, July 1, 2011

Rolo Brownies - new and improved version

I made the Rolo Brownies - in fact I made them the first day and then made them again the next day with some changes.  It still wasn't right.  It was bugging me all weekend.  I talked about changes to make to it with people that had eaten some and knew that I wasn't alone in feeling that these weren't up to par - well certainly not up to my standards.  (I have a perfectionist issue when it comes to my baking - totally comes from my Mom's side of the family).  I went to New Hampshire to spend a couple days with one of my best friends and to be "Auntie CB" with their kids - I love my time up there.  I always have fun and something entertaining always happens.  On my way home yesterday I planned out what I was going to do today - and tackling the brownies was on top of my list.  Too bad that only a couple hours after I got home last night I got into the kitchen and made them - I couldn't wait.  When Heay's got home she said "you've only been home for a couple hours and you've already baked something?"  I think I've got a problem - any one know of a support group for people like me? :) 

I made one slight change to the milk issue in the recipe - I didn't use evaporated milk this time and opted for milk in my fridge.  And I changed the amount of milk - 2/3 cup.  If you want to use evaporated milk its a whole 5 oz can.  The other change I made was after the first bake off I put the Rolo's on it immediately once it came out of the oven.  Then I filled in the holes with mini chocolate chips

chocolate everywhere!
I let that sit for 10 minutes and did all the dishes that had accumulated in my sink and once that was done I put the brownies into the oven for a minute - just until the tops of the Rolo's got smooshy (such a technical term I know, I guess you could say soft or starting to melt too).  Once that happens, take them out and put the top layer of brownie on top and bake off again. 

I had a taste tester happily say he wanted some of the new and improved version (he got some of the first batch) so i packed some up, even though they were still a little warm and falling apart in the plastic bag I had put them in, off I went to meet up with him.  He ate them - all of them - and then said amazing - this one's a winner. And I trust him because he gives me his honest opinion on things I give him - and he went to culinary school so we have technical talks sometimes about food and baking.  I had one this morning (yes - after I ate my breakfast) and I have to say this time they came out perfect!! Winner all around.  I mean look at this.........

delicious
.........who wouldn't want it?  Fudgy and carmel in the middle.  Heaven.