Monday, February 28, 2011

Mint-Filled Brownie Cupcakes

This is a great recipe to make with your kids.  They can be your little helper and have lots to do.  And if you love mint in your brownies, then this will be your new favorite! Fudgie and minty and oh so good.  But after a lot of trial and error with various mint patty products, use York Peppermint Patties.  If you use anything else, they melt during the baking process and just make the cupcake a mushy minty mess.  Trust me, it's not pretty.  Tasty, but hard to eat.  Save yourself the trouble and just buy a bag of York Peppermint Patties and you will have no problems whatsoever.  And this is another recipe where you don't need to break out your mixer, all you need is a bowl and a whisk.  I pull out another go to cookbook, Martha Stewart's Cupcakes.  This book gets a lot of use as well, but it's still in great shape, unlike my cookie one that is limping to the finish line. 

The batter is super simple, as are most brownie batters.  And before you know it, you are filling up the cupcake tins with some batter. 

just a tbsp of
batter

Once you get to this part, the kids can help.  They can unwrap all of the peppermint patties and then place one inside each cupcake. 

a little fudgie home
for the patties
Then you cover each pattie with batter and make sure that each one is covered completely.  Bake away and before you know it you are all done.  They smell amazing while baking.  Wait until they are fully cooled to eat, they taste better that way. 

delicious :)

Mint-Filled Brownie Cupcakes
makes 12

8 oz semisweet or bittersweet chocolate, coarsely chopped
1/2 cup (1 stick) unsalted butter, cut into pieces, room temperature
1 cup sugar
3/4 tsp salt
3 large eggs
1/2 cup all purpose flour
1/4 cup unsweetened Dutch-process cocoa powder, sifted
12 small (1 1/2") mini York Peppermint Patties

  1. Preheat oven to 350 degrees.  Line a standard muffin tin with paper liners.  Place chocolate and butter in a heatproof bowl set over (not in) a pan of simmering water.  Stir occasionally just until melted, 4-5 minutes.
  2. Remove bowl from heat.  Whisk in sugar and salt until mixture is smooth; whisk in eggs to combine.  Gently whisk in flour and cocoa just until smooth (do not overmix).
  3. Spoon 1 heaping tbsp of batter into each lined cup. Place 1 peppermint patty on top, genlty pressing into batter.  Top with 2 tbsp batter, covering patty completely.  Bake, rotating tin halfway through, until a cake tester inserted halfway in centers (above mint patty) comes out with only a few moist crumbs attached, about 35 minutes.  Transfer tin to a wire rack to cool completely before removing cupcakes. 

Friday, February 25, 2011

Pear and Prosciutto Appetizer

I had surgery the other day to fix a nerve issue.  It was a success and I'm back home resting and healing.  I do have some posts saved from me, but I also asked some friends to do a guest post for me.  So I decided to start with this one. This is from one of my favorite people in the world - and not just because I'm related to her.  AD has amazing skills in the kitchen, and one day I hope that she makes her dream of opening her own restaurant come true.  I asked her to do a post for me while I'm out for surgery and she gave me two! I'm so honored that she did this for me.  Love you AD - you are the best :)


Here is a super quick and delicious appetizer.  We were having friends to dinner and one of them happens to be allergic to gluten.  I had to rethink the menu, forget the shrimp bruschetta appetizer. The imported cheeses (sans crackers or pita) wouldn't cut it for our gluten free friend but fresh fruit would be a great alternative as long as there was more to chew on then fruit.  Because our friend is a bit of a carnivore, I figured I could put prosciutto on most anything.  If it's summer, we grill peaches and prosciutto, fall and winter means pears.  Just slice up some ripe bosc or anjou pears drape with thinly sliced prosciutto, drizzle with honey and good olive oil, then sprinkle with fresh crushed black pepper.


so pretty - and tasty :)


Wednesday, February 23, 2011

Cinnamon-Raisin Bread

I got my order from King Arthur Flour and I was so excited for it! I did a little happy dance when my UPS man delivered it to me.  I got a super duper new candy thermometer (I don't know what happened to my old one, but this one is FANTASTIC!), a box of cake flour, and the most amazing yeast set in the world.  Now that I had my fancy, new yeast, I had to make something with it! What to make?! So many possibilities, I wanted to make something that I haven't made before.  And then I found it......cinnamon-raisin bread.  I love anything that is cinnamon-raisin - bread, bagels, english muffins.  And it's my dads favorite as well.  So I go over to my parents house and get started on baking!  Let's be honest - I do love to use their oven, plus they have the counter space I need to make this, and it would be a little cramped if I made it at my place.  Anything that involves me rolling out dough is an automatic making it at my parents. 

One of my friends was on standby incase I had any questions with bread, or dare to say it, yeast problems.  So I go in with the attitude that this bread will turn out amazing and I will have no yeast problems because I now have the worlds best yeast.  And I'm happy to say, that's exactly what happened.  I got to work on the dough for the bread, and before I know it, I get to knead in the cinnamon and raisins.

let the fun begin
Now, it didn't turn out to be so easy, since I had to knead mainly with my left hand since my right hand is still injured.  But a couple minutes later, its all kneaded and goes into the bowl to rise. 

go yeast go!
Making bread takes up a good amount of doing nothing - just waiting for yeast to do its job and rise.  So I catch up on some TV, do my laundry and play with my parents dogs while I wait.  Once its doubled in size, I get to split the dough in half, make the cinnamon filling, fill them up and roll them into logs and put them into the bread tins to rise again.

yes, they don't look
so pretty and a little deformed
Once, again, back to the nice warm, sunny window they go to rise.  And one of the dogs was interested in what was in the tins and sat next to them while they rose.  Once they were at the tops of the tins, I brushed those bad boys with an egg wash and put them into the oven.  I love the smell of baking bread, and it quickly filled my parents house.  Soon, it was time to take them out.  I must say I was truly impressed with myself.  No yeast issues, the bread looked and smelled amazing.  I left a loaf for my parents and I took one home with me. 

golden brown goodness
I talked to my mom later that night.  She said her house smelled amazing when she got home.  And then when my dad got home, he was extremely happy to see a fresh loaf of cinnamon-raisin bread waiting for him.  The next morning I sliced myself 2 pieces and put mine in the toaster - buttered it up and was in heaven.  So good and a perfect way to start my morning with my cup of coffee. I will so be making this again.

Monday, February 21, 2011

Pizza Meatballs

I saw this recipe and was like "NO FREAKING WAY!" Pizza is one of my all time favorite foods - I never get tired of eating it.  And if you don't like pizza, then there must be something wrong with you.  So this recipe was a must make in my book.  And it didn't let me down at all! So good! And you can change up the filling, and I have a feeling no matter what filling you choose to put in it, it will not disappoint at all.  It was a huge hit with my entire family.  And I can't wait to make these again.  Makes an excellent snack or a good appetizer for a party. 

You also have the option of what kind of pizza dough do you want to use - whole wheat or regular.  Or you could always make your own dough as well.  I went the easy way and bought premade regular pizza dough at my local grocery store.  You only need 1/2 pound of dough, so I froze the other 1/2 for the next time I make these. 

The recipe calls for sweet or hot sausage - your choice of pork, chicken or turkey.  But you can really fill it up with whatever toppings you love on your pizza.  I think next time I make these it will be a mixture of bacon and pepperoni - a favorite of Ween and my Dad. 

I get to work on making the filling.  The hardest part was taking the sausage out of their casing....so easy.  Once I get the filling made I scoop out a tablespoon of filling and shape into balls and set them aside.

waiting for their doughy
home
Now comes the fun part, playing with the pizza dough.  You need to make sure that you have enough even pieces for the meatballs so they cook up evenly.  So I work with the dough and make it so I have enough even pieces for all my meatballs.  Then its all easy from this part on.  Take a meatball, place it in the dough and seal the meatball inside the dough so nothing is showing and its firmly sealed.


pre-sealed


all sealed and
ready to go
Now you get to fry them up in a pan, or you can bake them off in the oven if you don't want to fry them.  15 minutes later, heat up some sauce to dip them in and you are ready to go!


a fantastic snack
 
Pizza Meatballs
makes 16

1/2 pound sweet or hot uncooked Italian-flavored pork, chicken or turkey sausage
1 tbsp chopped parsley or oregano
3/4 grated mozzarella cheese (3 oz)
2 tbsp Parmesean cheese
1/2 lb pizza dough
3 tbsp extra virgin olive oil
3/4 cup jarred marinara sauce, heated
pinch of salt and pepper
1/4 cup flour

  1. Remove sausage meat from casings into a medium bowl.  Add mozzarella, Parmesan and the parsley or oregano, salt and pepper.  Mix with your hands until just combined.  Form into 16 even balls (1 tbsp each)
  2. Seperate pizza dough into 16 even pieces (about 1" balls).  Working with one piece of dough at a time, flatten it with your fingers and stretch dough.  Lighly dust dough on both sides with flour.  Wrap dough around a sausage ball and pinch dough well to seal.
  3. Heat oil in a large non-stick skillet over moderate heat and cook pizza balls over moderately low heat, turning them, until golden brown and sausage is cooked, about 15 minutes (cut one in half to see if cooked through).  Let pizza cool for 5 min before serving.  Serve with marinara sauce for dipping.

Friday, February 18, 2011

Peanut Butter Cookies with Butterscotch Chips

I had a very nice request for some peanut butter cookies from an adorable man.  I thought no problem! I've got tons of recipes for those! Easy, done.  Then he threw out that he wanted butterscotch chips in them.  Strange I thought, but he said that these were his favorite cookies. So I did a little comparing of recipes and ultimately came up with my own recipe for these bad boys.  

I get out a couple of my cookbooks and start to compare recipes.  They vary a little from book to book, so I decide to take what sounds the best from each cookie recipe to make my own "super cookie".  Super cookie indeed! So creamy and delicious.  Peanut Butter Cookies aren't really my favorite, but I will definately make these again if someone wants Peanut Butter Cookies. 

I think the key with a cookie like this, is that you want a really creamy, fluffy batter.  And that's what I got


look at how creamy and
fluffy it is!!
And I have to admit, I wasn't too sure about adding butterscotch chips, but they totally made the cookie have that little something extra and a little unexpected.  And it is a really tasty cookie.  I scoop the batter with my trusty cookie scoop (if you don't have one, you really should get one - I love mine....it makes making cookies so easy since they all come out the same shape and size) and bake them off.


perfect size with my
cookie scoop :)
10 minutes later, my house smells amazing and I have cookie perfection. 


golden brown and delicious
 I let them cool and then pack them up in a tin for the adorable man who requested these.  I was extremely pleased with how good they turned out on my first try with a new recipe.  Usually I can find things that I don't like about it and make a note for the next time I make it.  But I feel really confident with this version and am going to not change anything about it.  And the recipient was a very happy camper :)   They turned out better than I thought they would - and he said they tasted better than he could of imagined.

So here's my "super cookie" recipe.  I hope you like them

Peanut Butter Cookies with Butterscotch Chips
 makes 2 1/2 dozen

1 1/4 cups all purpose flour
3/4 tsp baking soda
2 sticks butter (1 cup) unsalted butter, room temperature
1/2 cup sugar
1/2 cup packed brown sugar
1 large egg
1 tsp vanilla extract
1 1/4 cups smooth peanut butter
6 oz butterscotch chips
  1. Preheat oven to 350 degrees. Whisk together flour and baking soda in a bowl.
  2. Put butter and both sugars in the bowl of an electric mixer fitted with the paddle attachment; mix on medium speed until pale and fluffy, about 3 minutes.  Add egg; mix until well combined.  Mix in vanilla and then peanut butter. Reduce speed to low.  Add flour mixture; mix until just combined.  Stir in butterscotch chips.
  3. Drop batter by heaping teaspoons onto baking sheets lined with parchment paper or Silpats, spacing about 1 1/2" apart.
  4. Bake cookies, rotating sheets halfway through, until centers are firm and edges are lightly browned, about 10-12 minutes.  Transfer cookies to a wire rack to cool completley. 

Wednesday, February 16, 2011

Peanut Butter Swirl Brownies

I love brownies - especially fudgie chocolaty ones.  And that's what these are.  I've made them so many times (from MS' Martha Stewart's Cookies) and I love them so much.  Sadly, the book is falling apart and pages are falling out.  What to do?!  Slight panic and terror sets in. I gently tucked them back in their place and I know the end is near for this beloved book of mine.  Making these so many times doesn't stop me from trying new things with it.  I now use it as a base recipe and constantly change things up when I make them.  And I must say, what I did this time was a success.  They came out extra fudgie and oh so good. 

Now, if you're thinking "I can make brownies out of a box and they are great" you are so wrong my friend.  Try these and you will never go back to boxed brownies. I promise you - that good. The great thing with this recipe is that you don't even need to get out your mixer, all you need is a whisk.  Even better, right?!  The batter comes together quickly, and the hardest part of this is that you make a peanut butter filling as well.  I think you can handle it :)

I get the oven preheating and get both batters going.  I fill up my pan with most of the chocolate batter and then I put dollops of the peanut butter filling in the pan.  It's kinda fun, who doesn't like to play with their food?  Reminds me of childhood.  Once I'm done putting in the peanut butter filling I add the rest of the chocolate batter. 
it looks like a mess
And now comes the fun part.  I take my knife and swirl all that goodness together - trying to make a fun design so it will bake up pretty.  It never looks pretty no matter how I hard I try. 

swirled goodness

Into the oven it goes, and sadly they do bake for a long time - which is the only draw back from boxed brownies.  But they are so worth the wait!!  45 minutes later and here it is - brownie goodness

they taste better
than they look
My house smelled amazing all day thanks to these.  And they are always a hit with everyone - even people who aren't really fans of peanut butter will love these.  I highly suggest that you try these next time the urge to bake comes over you. 

Here is the recipe from MS's Cookies Cookbook

Peanut Butter Swirl Brownies
makes 9 large or 16 small

For the batter:
1/2 cup (1 stick) unsalted butter, cut into small pieces, plus more for pan
2 oz unsweetened chocolate, coarsely chopped
4 oz semisweet chocolate, coarsely chopped
2/3 cup all purpose flour
1/2 tsp baking powder
1/4 tsp salt
3/4 cup granulated sugar
3 large eggs
2 tsp vanilla extract

For the filling:
4 tbsp (1/2 stick) unsalted butter, melted
1/2 cup confectioners sugar
3/4 cup smooth peanut butter
1/4 tsp salt
1/2 tsp vanilla extract

  1. Preheat oven to 325 degrees.  Butter an 8" square baking pan and line with parchment, allowing a 2" overhang.  Butter lining (not overhang)
  2. Make batter:  Put butter and chocolates in a heatproof medium bowl set over a pan of simmering water; stir until melted.  Let cool slightly.  Whisk together flour, baking powder, and salt in a bowl.
  3. Whisk granulated sugar into chocolate mixture.  Add eggs, and whisk until mixture is smooth.  Stir in vanilla.  Add flour mixture, stir until well combined.
  4. Make filling:  Stir together butter, confectioner's sugar, peanut butter, salt and vanilla in a bowl until smooth.
  5. Pour one-third of batter into prepared pan; spread evenly with a rubber spatula.  Drop dollops of peanut butter filling (about 1 tbsp each) on top of batter, spacing about 1" apart.  Drizzle remaining batter on top, and gently spread to fill pan.  Drop dollops of remaining peanut butter mixture on top.  Gently swirl peanut butter filling into batter with a butter knife, running the knife lengthwise and crosswise through layers.
  6. Bake until a cake tester inserted into brownies (avoid center and edges) comes out with a few crumbs but is not wet, about 45 minutes.  Let cool slightly in pan, about 15 minutes.  Life out; let cool completely on a wire rack before cutting into squares. 

Monday, February 14, 2011

Amazing Doughnuts

One of my best friends runs her own business and I'm a huge fan.  If you aren't following her on her website and blog then shame on you.  You should become a fan right now! I've taken countless recipes from her and everything I've made is delicious.  Please check her out at the following websites - I promise you will not be disappointed at all. 
Arubula's Kitchen is where you can get weekly menu planning.  And her blog is Running Amuck with Arubula.  I plug her constantly, and not just because we've been friends for 17 years, but because I'm a huge fan of hers :) She is truly talented.  And I love that we share recipes all the time. 

She recently did a blog post about chocolate doughnuts.  I love doughnuts.  Who doesn't?!  We were talking about it and I said that I had to make those soon.  She sent me her base recipe and I couldn't wait to make them!  Finally this weekend rolled around and it was time to make the doughnuts (yes - I went there).  And let me tell you - AMAZING! I seriously can't stop eating them.  The fact that this recipe doesn't have yeast in it (cause we all know how I have issues with yeast) made me want to make them that much more! Super easy and damn tasty!

I get to work on making the dough - so easy.  I love easy recipes.  Anything that isn't too labor intensive is great in my book.  She had warned me ahead of time that once I turn the dough out to chill that it needs to be well floured.  I told her I would flour the crap out of that dough.  And that's what I did. 

you should of seen the amount
i had under the dough!
Off to the freezer it went to firm up.  20 minutes later it was time to cut the doughnuts.  I don't have a doughnut cutter and all my cookie cutters were way too ginormous to use, so I used what was handy in my parents kitchen - a small glass and a nifty looking tall shot glass.  Success. 


doughnuts and doughnut
holes
Once all cut, they go back into the fridge to chill for 20-30 minutes.  Then its time to fry the doughnuts.  I get the oil all ready and away I go.  Now, I've never made doughnuts before, so this was kind of fun for me.  I get the first few in and they puff up and cook nicely.  And of course I eat one after its cooled a little - sooooo good.  I fry away a couple more and then I hit a huge snag.  All of my doughnuts and doughnut holes have stuck to each other!  CRAP! 
What to do?!  I try to pull them apart from each other, but they wanted no such thing.  They were very happy to be stuck together and didn't want to let go.  :(  So I did the only thing I could think of, smooshed it all together to make one massive blob of dough and then pull off balls of dough and fry them up.  So I had a couple of fantastic looking doughnuts and then came this mess of the worlds ugliest looking doughnuts.  It was amusing to say the least. 

Once all fried off, I had two options for toppings.  Cinnamon sugar and a glaze.  Away I go dipping in cinnamon sugar and glaze......who cares if they don't look good!  They taste amazing! 

glazed goodness
These were the best looking ones.  The next photo will give you some chuckles.  Although I did my best to hide the truly strange looking ones underneath the pile. 

at least I got one perfect
doughnut on top :)
So far this morning, I have to say, I can't stop snacking on them.  I left half at my parents house and took the rest home with me and my sisters.  The glazed are all gone and theres only a couple of cinnamon sugar ones left.  Go to my friends website and get the recipe! Become a follower of hers!  Support her amazing talent and love for food!

Sunday, February 13, 2011

A surprise package in the mail

I go to my mailbox yesterday and found a great surprise waiting for me.  A nice envelope from King Arthur Flour.  My first thought was "I must of signed up for something a while ago" but I didn't remember signing up for anything.  I get inside and open it up and this is what I find.

why yes, yes I will
have happy baking
I thought thats a neat way to send a catalogue.  How cute. Then I flip it over and open it up


i do love to bake :)

a gift card!!
oh happy day!
And on the inside of one of the flaps was the sweetest note.  "Thanks Cookie Goddess.  From your #1 fans"
LYNDA AND BAXTER SENT ME A PRESENT!! Just for sending them some cookies! I was floored!  And I immediately texted them to thank them profusely.  I couldn't believe how nice that was of them.  I didn't expect anything in return from them, just wanted to send some cookies to them.  They told me they wanted to support me in my passion and let me bake my heart out.  Well, damn skippy thats what I'm going to do!

I look through the catalogue countless times, making a list trying to help me narrow it down.  I decided against ordering any of their mixes and stick with supplies and fun things that I don't have, like a tart pan.  But my first thing I knew I was going to purchase was something I have blogged about (and I believe is Lynda's favorite post) - yeast.  They have really good yeast and I decided to go all out and get the set of yeast, yeast spoon and an airtight canister.  I thought if I had really good yeast I wouldn't have anymore issues like I did at Thanksgiving. 

I placed my order and can not wait for it to get here!  Thank you once again Bax and Lynda - I'm sure I will be sending you many care packages to thank you for this great gift! :)

Friday, February 11, 2011

Lemon Madeleines

I figured I would take a break from making chocolatey, heavy things and go for something light.  Plus I had a request for something lemon from one of Heay's coworkers.  And the boys at her work were getting anxious because I had promised them treats this week and it was already Wednesday and there were no treats.  So yesterday I got to baking.  After a quick trip to the grocery store to get a couple of things, I came back home and got to work on the cookies.  Now, I always wanted to make these, but never bought the pans.  Over the years I ended up with 2 sets of Madeleine tins - two that are mini and two that are normal sized. 

my mini tins :)
I pull out the cookie bible (its getting a lot of use this week and still going strong, but I fear the final day will come soon) and get the batter going.  This cookie is so easy to make and it is a light and cakey cookie with a hint of lemon - delicious.   And the cool part is once you get it all together, you let it sit for 30 minutes and it thickens and doubles in volume.  I thought it was pretty cool the first time I made these.  But then again, I'm a nerd :) Make sure you butter the tins really well or spray the crap out of them with Pam or whatever cooking spray you use.  If you don't the cookies wont slide out and will stick to the tins and tear.   The first time I made these, I apparently didn't do a very good job at this step because half of them ended up stuck in the tins and I was a very frustrated CB.  So now I go above and beyond spraying down the tins every time and haven't had a problem with them sticking since. 

Once the cookies are done baking, you can coat them in confectioner's sugar.  I suggest you do this, it gives that cookie a little something extra, although they are delicious if you decide to keep them naked as well. 

mini Madeleines coated and cooling
I did one batch of minis and one batch of full sized ones.  Once they were all cooled and ready to go, I went off to go play cookie fairy to the boys at Heay's work and a bag went to Ween's coworkers as well (luckily they work a couple of minutes from each other.)

regular sized Madeleines
The boys loved them and so did Ween's coworkers, who told Ween that it must be a dangerous thing living with me because I make so many treats all the time. 

Lemon Madeleines
makes 2 dozen

1 1/2 cups sifted cake flour (not self-rising)
1/2 tsp baking powder
1/4 tsp coarse salt
3 large eggs plus 2 large egg yolks
3/4 cup granulated sugar
1 tsp vanilla extract
2 tbsp finely grated lemon zest
2 tbsp fresh lemon juice
3/4 cup (1 1/2 sticks) unsalted butter, melted, plus more for pans
Confectioner's sugar for dusting (optional)

  1. Sift together flour, baking powder and salt into a bowl.
  2. Put eggs, egg yolks, granulated sugar, vanilla, and lemon zest and juice in the bowl of an electric mixer fitted with the paddle attachment.  Mix on medium-high speed until pale and thickened, about 5 minutes.  Mix in butter.  Using a spatula, fold flour mixture into egg mixture.  Let batter rest 30 minutes. 
  3. Preheat oven to 350 degrees.  Butter two madeleine pans.
  4. Pour batter into prepared pans, filling the molds three-quarters full.  Bake cookies, rotating pans halfway through, until edges are crisp and golden, 7-8 minutes.  Let cookies cool slightly in pans on wire racks.  Invert, and unmold.  Dust with confectioner's sugar, if desired. 

Thursday, February 10, 2011

Cookies in the Mail

I sent off a care package full of cookies to my friends that live in Denver.  I was like a little school girl all day yesterday waiting until their mail came so they could dive into the box and eat the cookies.  I was dying to know how they liked them.  I sent a bag of Aunt Polly's Raisin Cookies and Chocolate Thumbprints.  One of them is a HUGE shortbread fan, so I had to make the thumbprints.  The other has had my baking many times thanks to us meeting in school almost 10 years ago (wow thats a long time!)  We were talking and the request came down for cookies and I happily made them some and sent them off on their merry way to Denver.  Praying and hoping that they got there in one piece and still fresh and in good shape.  Then finally, I got my first email from them, saying that they got the package.  And then the fun began.  They were nice enough to take pictures of the whole event - which made me laugh so much.  But I'm only going to share my favorites of their experience. 

Needless to say, the 2 hour time difference was killing me.  So I didn't hear from them until around 6 PM my time.  Waiting all day really sucked.  But once I got the first email from Lynda - the fun really began. 


COOKIES!!! :) 
and all the bags I used
to make sure they got
their in 1 piece

I love getting feedback on my baking from people.  It lets me know what I need to tweak and when to leave a good recipe alone.  And people that know me give me great feedback - and it has helped me out a lot.  One time I made cookies that I thought were alright and I wouldn't make again, but everyone I gave them to said they were amazing and I must make them again! So what do I know?! Now, if you read the post about the thumbprints, Lynda and Baxter were nice enough to leave some very nice comments.....and amusing.  But most of our talking back and forth happened on Facebook and through texting.  They were so happy that I sent them cookies - but 2 kinds?! Forget it!


YAY!! COOKIES!!
Baxter has had my baking for years, but it was in the early years of my baking and I mainly stuck to just chocolate chip cookies and brownies and sugar cookies - you know, easy things.  Last year I got to have a great visit with Baxter and another friend of ours and then came the time when I introduced my better level of baking to Baxter.  :)  So Lynda has been hearing all these stories about my baking, so I had to share the goodness with her.  I didn't expect the comments they said at all...but it made me smile and feel loved from so far away.  I think my favorites were from Lynda "OMG, freakishly good. Like, JOIN THE CULT good. I'd drink the Kool-Aid for these cookies. THAT good"

Love with a raisin cookie :)
If you know me in real life, and you know Baxter and Lynda as well, I highly suggest you check out all of the amazing pictures of the cookie arrival on Facebook.  They are too freaking cute together! And my friend Amy is truly jealous that they got a care package of cookies and she got nothing.  Sissy - you know yours is in the works! :)  


Wednesday, February 9, 2011

Chocolate Thumprints

I love these cookies.  Acutally, they are one of my sisters, Ween, favorite cookies.  Everytime I can't decide on what cookies to make, she throws out 2 options for me - Snickerdoodles or Chocolate Thumbprints.  And who wouldn't love a shortbread cookie filled with a chocoalte ganache?!  Sign me up!  I think shortbreads are under rated in the cookie world and often get over looked.  They are an excellent cookie, and ridiculously easy to make.  If you've never tried a shortbread, you are missing out.  So why not start with these?!  So easy and the perfect bite size cookie. 

What made me want to make these was a conversation with one of my friends out west.  We were talking about my blog and how its been a long time since they've had my baking (actually one of them has never had my baking at all).  One of them loves shortbread, and it was like a lightbulb went off - Chocolate Thumbprints!  Perfect cookies to be sent in the mail.  So away I go and pull out my cookie bible (Martha Stewarts Cookies) - and I'm happy to say it has lived another day.  This is one recipe that I make so often the book actually opens right to the page - sad isn't it?  I pull out my stand mixer and get going on making the dough.  The first time I made these, I was surprised to learn that there are no eggs in a shortbread.  And then I thought to myself - thats why its called a shortbread.....Im super smart sometimes.  I get the dough all made and then comes the fun part, making little balls of dough.  Because the dough doesn't really expand you can fit a large amount of cookies on each sheet - which is awesome.


look at how many I fit on there! :)

You bake them for 10 minutes and then comes the fun part.  You get to make holes in the cookies for the ganache filling to go into.  I've used everything from my thumb (the cookies are really hot and I dont suggest using your thumb) to the end of a wooden spoon - which actually works the best.  So I poke holes in the cookies and back into the oven they go to get golden brown.  But don't press too hard when making the holes, you can break the cookie in half.


its fun making the
holes

Once these bad boys cool off, I make the ganache.  Yes - another ganache.  But I'm back to myself this time so there were no mistakes.  :)  I melt the chocolate, butter and corn syrup and let it thicken until the right consistancy and I get started on filling the cookies.  I've learned over the years of making these that the easiest thing to do is just pour the ganache straight from the bowl.  I've tried everything from using a spoon to fill each cookie to a pastry bag and everything in between.  The pastry bag worked great, but it was another thing to clean.  So I always use a small bowl with a spout on it to pour things.  It will make your life so much easier this way.  I fill each cookie and I always have some ganache left over, so I go back through another round of filling the cookies a little more. 


yum :)
Then all thats left to do is let the ganache firm up and you are ready to eat them.  Once they were ready to be eaten, I packed some up, along with some raisin cookies, and sent them on their way to Denver.  They should be getting their cookies today - and I can't wait to hear the feedback! And needless to say when Ween got home from work and found out I made cookies she was so happy.  But then she asked what cookies I made and I told her it was Chocolate Thumbprints, she went straight to the cookie jar to eat a few.  :)


Chocolate Thumprints
makes 4 1/2 dozen

2 sticks (1 cup) plus 6 tbsp unsalted butter, room temp
1 cup confectioners sugar
1/4 tsp salt
2 tsp vanilla extract
2 1/2 cups all-purpose flour
6 oz semisweet chocolate, chopped
2 tsp corn syrup

  1. Preheat oven to 350 degrees.  Line two baking sheets with parchment paper or Silpats.
  2. In the bowl of an electric mixer fitted with the paddle attachment, beat together 1 cup (2 sticks) butter, the confectioners sugar, salt and vanilla on medium speed until smooth, about 2 minutes.  Beat in flour, beginning on low speed and increasing to medium until combined.
  3. Form balls using 2 teaspoons of dough for each; place balls 1 inch apart on prepared baking sheets.  Bake 10 minutes, remove from oven, and press thumb into cookies to make deep, wide indentations.  Rotate pan, and return to oven; bake until light brown on the edges, 7-9 minutes more.  (If the indentations begin to lose definition, remove cookies from oven and press again.)  Transfer to a wire rack to cool completely.
  4. Combine chocolate, the remaining 6 tbsp butter and the corn syrup in a small heatproof bowl set over a pot of simmering water; stir occasionally until melted and smooth.  Allow to cool a bit until slightly thickened.  Fill thumbprints with the chocolate mixture, and set aside to firm up. 

Monday, February 7, 2011

Aunt Polly's Raisin Cookies

As you can tell, I've been not feeling like myself the past week.  My sisters decided to have a Girls Night Out Saturday night - dinner and drinks.  It was the best night.  Totally snapped me out of my funk and I feel like me again.  So what did I do yesterday, thats right, bake.  And at my parents house, with my favorite oven ever.  Now, when I started this blog I didn't think that anyone would read it.  When I told my mom that I started one, her reply was "Oh Cb, you've really got too much time on your hands".  I said yes I do but you should still read it mom.  Her next reply was "So its like that Julie and Julia thing?"  I laughed and said its like that but Im not going to go through Julia Childs cookbook and make everything, this is about me in the kitchen and my boo boos and triumphs.  I told her to get back to me once she read it and let me know what she thinks.  I never would of imagined that my parents would be my biggest fans of my blog.  My mom loves my posts and especially loves when I post things that I've made in her kitchen.  And my dad had told me that I can blog about him, but if I put a picture of him up on here he would "disown me".  And then he proceeded to ask me all weekend when I was going to make those Chocolate Chip Cookie Dough Cupcakes again.  :) 

So I was really in the mood to make these cookies - the best Raisin Cookies EVER!  I love to eat them warm - soooooo good.  And these cookies are so easy and it makes a ton.  My mom is a fan of having some in the morning with her tea.  It is a great alternative to a regular chocolate chip cookie or an oatmeal raisin cookie.

I get going on the raisins....first you have to boil them in some water for 5 minutes before you can do anything else.

trust me, dont skip this step - it makes
the raisins so juicy and delicious


Once thats done and they are cooled, you get going on the batter.  Kind of easy - its one of those throw everything in a bowl and mix it ones.  Then I get out my trusty cookie scoop - which I love - and scoop away


i love my cookie scoop
and my Silpat pads :)
 And then I take them out of the oven once they are golden brown


nice and warm
I suggest you eat them warm - sooo good.  But they are great fully cooled too.  I usually stick them in the microwave for a couple seconds if they are fully cooled. 


yummies
And once I was all done and putting them away in the cookie jar, Heays said that she would like these more if they were chocolate chip cookies.   

Thursday, February 3, 2011

Truffle Brownies

Im on a roll, having a spectacularly crappy week.  So I thought that I would try to bake again....didn't really go that well. My heart is still not really into it.  I got out my Martha Stewart "Martha Stewart's Cookies" cookbook.  Now, I've used this thing so many times, it's falling apart on me.  :(  I will eventually have to break down and get a new copy of it since pages keep falling out and I've got numerous stains on pages (a sign of an excellent cookbook).  Everytime I use it I pray to the baking gods that it will make it through this session and live on for another day.  And I will most likey shed a little tear when the day comes that I have to throw it away....Im such a nerd.  But this is my "go to" book - never lets me down when I need a recipe for something or when I want to make my own version of something in the book. 

And I used this as an excuse to finally use my springform pan that has just been sitting in my baking cabinet, dying to be used.  So why not make a delicious fudgy brownie with a fantasic chocolate ganache topping?  Sounds perfect to mend my broken heart.  So I get to work and make the batter.  Things seem to be going pretty well and before I know it, I'm pouring the batter into my springform pan.


chocolatey and fudgey batter :)

Away it goes into the oven and I let it bake and then take it out to let it cool.  Once its fully cooled, I started on the ganache.  I love making these - always nice and rich and delicious.  It is time consuming because depending on which one I'm making (I've got a couple recipes for different types of ganaches) depends on how long it takes for it to set.  This one called for up to 30 minutes.  And against my better judgement I poured it ontop of the brownies.  I knew this was a mistake - I should of listened to myself. 


ganache - and my festive
winter spatula
 It needed another 15 minutes to finish setting up.  It wasn't thick enough and I thought it would be ok to pour it on top of the brownies to finish setting.  Big mistake.  :(  I've got high standards when I make things - I always want them to come out perfect and I'm not happy with them if they turn out "just ok" in my eyes. 
I stick it in the fridge praying that it will set up right, but I knew that it wouldn't really.  So I check on it hours later and it did set up. When I go to cut it up, the ganache starts to run.  :(  I knew it would still taste the same and my sister Heays coworkers wouldn't care about looks (its mostly guys - they really don't critique the look of the treats, just the taste.  They are more excited that she's got stuff for them to eat than what it is or what it looks like).  I stick them in the fridge until she goes to work. 


not the best looking, but
still delicious though
They were a hit with her coworkers, which I knew they would be.  I'm just more bummed that I couldn't get it right.  Lesson learned - stay out of the kitchen until fully ready to put my heart back into making things. 

Here is the recipe for those wanting to attempt it :) 


Truffle Brownies
makes about 1 dozen

for the batter:
1/2 stick (4 tbsp) unsalted butter, plus more for pan
3 oz unsweetened chocolate, coarsely chopped
1/2 cup all-purpose flour
1/4 tsp baking powder
1/2 tsp coarse salt
1 cup sugar
2 large eggs
1/4 cup whole milk
1 tsp vanilla extract

for the ganache:
4 oz semisweet chocolate, coarsely chopped
2/3 cup heavy cream

  1. Preheat oven to 325 degrees.  Butter a 9" springform pan.
  2. Make batter:  put butter and chocolate in a heatproof bowl set over a pan of simmering water; stir until melted.  Let cool slightly.
  3. Whisk together flour, baking powder, and salt in a bowl.
  4. Put sugar and eggs in the bowl of an electric mixer fitted with the whisk attachment, and mix on medium speed until pale and fluffy, about 4 minutes.  Add chocolate mixture, the milk, and vanilla, and mix until combined.  Reduce speed to low.  Add flour mixture; mix, scraping down sides of bowl, until well combined.
  5. Pour batter into prepared pan.  Bake until a cake tester inserted into brownies (avoid center and edges) comes out with a few crumbs but is not wet, 27-30 minutes.  Let cool completely in pan on a wire rack.
  6. Make ganache:  Put chocolate in a bowl.  Heat cream in a small saucepan over medium-high heat until just simmering.  Pour over chocolate; let stand 5 minutes.  Gently stir until smooth.  Let ganache cool, stirring every 10 minutes, until slightly thickened, 25-30 minutes.
  7. Pour ganache over cooled brownies in a pan; let set, about 20 minutes.  Refrigerate until cold, 30 minutes to 1 hour.
  8. Let brownies stand at room temperature at least 15 minutes before serving.  Release springform, and remove brownies; cut into wedges, wiping knife with a hot damp cloth between each cut.  Scatter sprinkles on top, if desired.  Brownies can be refrigerated in a single layer in an airtight container up to 2 days.  Bring to room temperature before serving

Tuesday, February 1, 2011

Baking with a broken heart

I got dumped yesterday :( I kind of saw it coming, but it still hurts.  We just weren't on the same page with things. And I respect him for it - he did the right thing and it was the best relationship I've ever been in.  As I look back on it now, I can see more warning signs of the end is near.  We went over 2 weeks without seeing eachother (which was extremely uncommon for us), we were barely talking, he didn't say anything about my blog - I don't even know if he has read it at all.  The list goes on and on.  It always hurts when a break up happens, but this one is different.  I thought that he was "the one" - as cliched as that sounds, I could actually picture myself marrying this man and starting a life with him.  (I came close to marrying an ex, went ring shopping, looked into buying a house, and when it came down to it, I couldn't see myself marrying him and ended the relationship).  It was different with him, I was happy and everything in me told me it was right. 

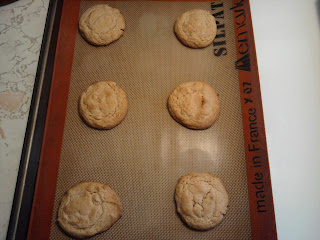
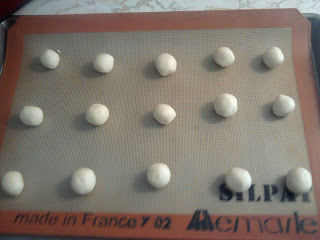
So here I am, in my kitchen trying to bake and be happy.  Just not happening.  All I could do was pull out the tub of cookie dough from the freezer, let it thaw,


luckily i had some left over
from the cupcakes
  and bake off the cookies.


didn't make much, but
its something
 My heart just isn't in it today.  I will try to make something later, but who knows how it will turn out.