Friday, April 29, 2011

Fudge Ecstasies

OK - I'm going to start this one off by saying this cookie has the worst name ever.  It honestly makes me giggle.  I call these bad boys Brownie Cookies - mainly because that's what it is - a brownie in the shape of a cookie.  And who wouldn't like that?! 

These are easy and super quick.  I got it from a great book - " Biggest Book Of Cookies".  And it is the biggest book of cookies I've ever seen.  Lots of great recipes in there and fun festive cookies - and we all know how I love holiday baking! 

And who doesn't love a recipe where you don't have to pull out your mixer?!  All you need is a trusty spatula or whisk and a bowl.  The dough is easy to make and before you know it, you've got fudgie cookies. 

this dough is damn
tasty
Bake those bad boys off and then you have this

awww yeah!

My only complaint - this doesn't make a lot of cookies.  So I suggest doubling it.  Because they are tasty and fudgie.  And shortcuts on this one - use silpats or parchment paper instead of greasing the pan;  for melting the chocolate - just stick it in the microwave...I always do.  Who wants to do that double-boiler thing everytime you need to melt chocolate?!

Fudge Ecstasies
makes 30 cookies

 1 12 oz package of semisweet chocolate chips
2 oz unsweetened chocolate, chopped
2 tbsp butter
2 eggs
2/3 cup sugar
1/4 cup all purpose flour
1 tsp vanilla extract
1/4 tsp baking powder

  1. Preheat oven to 350 degrees.  Grease a large cookie sheet; set aside.  In a medium heavy saucepan heat 1 cup of the chocolate chips, unsweetened chocolate and butter until melted, stirring constantly.  Remove from heat; add eggs, sugar, flour, vanilla, and baking powder.  Beat with a wooden spoon until combined, scraping sides of pan occasionally.  Stir in remaining 1 cup of chocolate chips.
  2. Drop dough by rounded teastpoons 2" apart onto the prepared cookie sheet.  Bake for 8-10 minutes or until edges are firm and surfaces are dull and crackled.  Transfer cookies to a wire rack and let cool.

Wednesday, April 27, 2011

Frozen Chocolate Pie

It's been so hot and humid here that I was totally in the mood for one of my favorite frozen desserts!  And I am in the process of recruiting new taste testers (my family has sadly had enough of this position - and I have to say that I can't believe it took them this long for it to happen) so I had one ready and waiting for this amazing dessert. 

After my giant fiasco on Easter, I thought this would be a great thing to make - I mean what else could happen right?!  I decided to improve upon this pie with certain, and am truly pleased with how it turned out.  I'm still working on making this one perfect, but I will post this version of the recipe for those of you looking for a quick, easy treat that anyone can make. 

So it's pretty simple, and even those who "can't bake" can pull this one off.  First I mix together cream cheese and some hot chocolate mix

chocolate cream cheese!
Then after that is smooth and well mixed, I mix up the pudding.

mmmm...pudding
This is as hard as it gets - see what I mean that anyone can do this?!  So once those are both ready, I add the pudding to the chocolate cream cheese mixture.  Once those are well combined, I break out the Cool Whip and fold that in.  Towards the end I will add some chopped up Oreos and mix until well mixed in.

yummies
You have an option of what you want to use for pie crusts.  You can make your own or buy the premade ones.  I like the Oreo premade one - and that's what I used here.  Pour that bad boy into the pie tin and smooth out.  Then you have your choice of how you want to decorate it.  I made two pies.....one for my volunteer taste tester

pretty
....and then the one for me I was running out of the awesome Fudge Covered Oreos and just chopped them all up and went for broke

not so pretty - but
damn tasty

So there you go people!  This pie is versatile and can go in either the fridge or the freezer - but it's way better in the freezer.  I also have a Frozen Lemonade Pie version that I will make and post at some point.  But for now, here's the Chocolate recipe.

Chocolate Frozen Pie

1 8 oz package of cream cheese
1 packet of hot chocolate mix
1 3 oz package of chocolate pudding
1 8 oz container of chocolate cool whip (thawed)
1 1/4 cup cold milk
15 Oreos (chopped)
1 chocolate cookie pie crust

In a large bowl, beat cream cheese and hot chocolate mix until smooth.  In another bowl, mix the milk and pudding together for about 2 minutes; it will be thick.  Add pudding into cream cheese mixture.  Add 1/3 of the cool whip into the mixture and fold.  Gently fold in the rest and add the chopped Oreos.  Pour into pie crust and smooth out top.  Garnish with Oreos.

Stick either in fridge or freezer.  If you are freezing it, let sit a little before cutting it. 

My volunteer taste tester was so excited for this!  Her words were "A-freaking-mazing!"

Monday, April 25, 2011

Cookie Cake

I love this cake.  It always reminds me of being a kid and Easter....mainly because it's the only time we ever have this dessert.  Besides, who doesn't like a dessert that literally takes minutes to make.  All you need is some cookie wafers and whipped cream - store bought or homemade.  I've made this dessert many times, and it's probably the most simple thing I will ever post on here.  At least that's what I thought yesterday.  Apparently, the baking gods thought I was due for a GIANT meltdown - and let me tell you did I ever have one.  And over something soo simple! Needless to say I was texting my friend Kate all day long....and a giant thanks to you for making me laugh about it during my meltdown. 

So let's start this atrocity at the beginning.  It was very hot and humid yesterday where I live - not good weather for making your own whipped cream.  I got the cream whipping and took out the plate I was going to put the cake on and I got the cookies out.

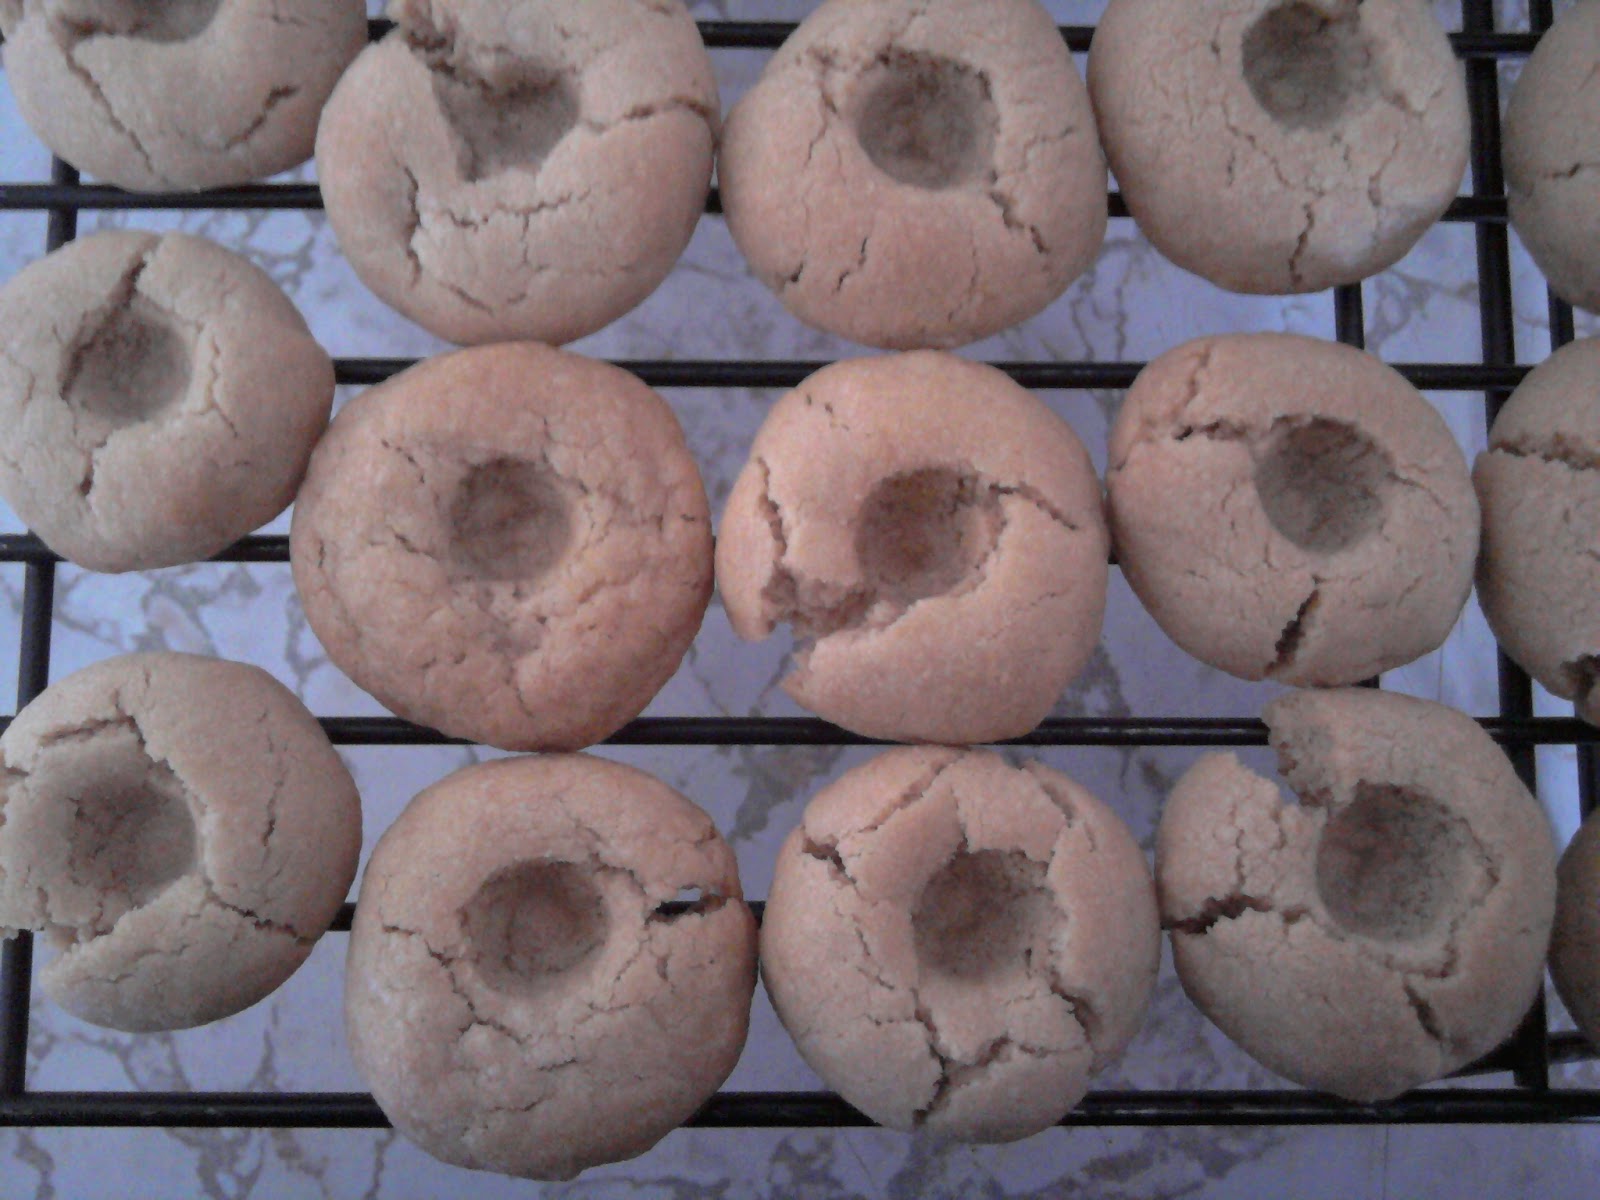
chocolate wafer cookies
Once the whipped cream was ready.....

yum! fresh whipped cream
.....I got going on assembling the cake.  Normally I make it in 2 rows and it kind of looks like a white frosted log.  This year I wanted to be festive, so I decided to make it in the shape of an egg and decorate it.   Cute, right? 
kind of an egg shape
Once I got it into the shape I wanted, time to frost the top and sides of it. 

naked egg
Now, at this point, you would think that I should see that the whipped cream is starting to melt.  And I do see that.  But all I have left to do is decorate it before I can stick it in the fridge for it to chill.  And a minute later I have this

pretty! kinda
I take the cake to my parents other fridge outside in their garage.  As I get downstairs to put it in the fridge, the back side of the egg falls.  I'm standing there trying to push it back up and it wont stay.  So I let it sag - it still looks alright.  Not too much damage.  I stick it in the fridge and check on it an hour later.  What I found next was not pretty at all. 

im melting
I opened the door to the fridge and couldn't believe my eyes! The cake had melted! IN THE FRIDGE!!  A string of obsanities came flying out of my mouth.  What was I going to do?! I just ruined dessert!  I stuck it in the freezer to hopefully stop all the melting and to try to get it to firm up like it should be. 

I go upstairs, and get a nice glass of wine. 

oooh wine, how you calm me
OK, I had more than 1 glass, I had a good amount :)  At this point, Kate and I are texting back and forth talking about our meltdowns (she had one Saturday) and she said I had to offer one up to the baking gods and its a good thing it was a simple one.  I agreed - it would of really been an ugly scene if it was something hard that I was making.  She got me laughing and at this point it had been an hour of the cake being in the freezer.  I go back downstairs and check on it.  It had firmed up and I was happy as I could be with it, so I stuck it in the fridge so we wouldn't be eating a frozen cake. 

Hours go by and my mom gets going on dinner.  I decided to go check on my cake.  I opened the fridge door and it was like a giant slap across the face!!  Melting - melting like you wouldn't believe it!!  I could feel the baking gods laughing down at me - I mean really - how hard is it to mess this cake up and here I am with a seriously messed cake.  Fate was not on my side today.  And all I could do was stick the cake back in the freezer, go upstairs, have some more wine, and announce to my family and guest that I had the ugliest melted cake in the freezer so don't expect too much from dessert tonight. 

Dinner is over and now it's time for dessert - ugh.  I reminded everyone that it's ugly as sin, and they all turn to me and say I'm sure it tastes great.  I go and get the cake and plop it down on the table because at this point I'm so disgusted with it I don't even really want to look at it, let alone eat it. 

melted, destroyed and ugly
as sin
And because it's so hot and humid, the cake quickly starts to melt even more now.  Whipped cream slowly starts going all over the plate.  Not my best showing on any level at all!  But we cut into it and eat it - still tasty.  I was happy when we were all done and I could stick it on a smaller plate to put away.  And at this point I didn't care what happened to it anymore, so I stuck it back in the fridge.  Who cares if it melts anymore at this point - the poor cake has been through so much at this point already. 

I think it's safe to say that I will never forget this Easter.  Happy for the wine, Kate for making me laugh so hard, and my family for making me feel somewhat reassured that it was just the humidity that killed the cake and it would still taste great!

Friday, April 22, 2011

Easter Coffee Ring

Since it's Easter weekend - that means it's time to make Coffee Ring.  We only make it on holidays, and this is the last time I will make it for a while.  I know what you're thinking - halfway through there's going to be a picture of a giant drink because there was another meltdown......you're going to be disappointed if you are looking for that.  This time I had no incidents with the yeast.  Mainly because I have the best yeast ever!


my jar of yeast
and its scoop
 Because I now have this super duper yeast, there was no question or doubt that I would have any issues getting the yeast to activate.  And did it activate :)  For all of you out there who make breads and doughs that require yeast, don't keep getting those packets of yeast from the grocery store.  Invest in the good yeast that I got from King Arthur Flour.  It will be the best money you ever spent!  My mom still has a packet that we got at the grocery store left in her fridge, and I'm tempted to just throw it out on her. 

I'm not one for changing family recipes, they hold a piece of history and meaning.  But I did change up one thing in it this time.  And the change was an excellent one.  It made the dough so fluffy and it rose so nicely over the top of the large bowl we use.  I was impressed.


dough....pre-rising and
two punch downs
 I spread the making of this over 2 days because it was the way I was taught how to do it, and because over the years we have found out through trial and error and the dough is better with 2 punch downs instead of 1.  So day 1 is always making the dough and letting it rise; day 2 is rolling out the dough, filling it and baking it.  I'm still working on how to get the rings not to have one giant end and one small end of a circle, but my dad says it takes a long time of practice.

I love filling the dough - its fun and challenging when it comes to rolling it up and transferring the dough to to the pan for it to bake on.

filled, rolled, cut
and rising

Once on the tray it bakes on, I make some slits in the dough and spread it out to make room for the dough to rise once more before baking.  Once it's risen, time to put it into the oven until golden brown.


clearly I need to work on
making the rings even so this
doesn't happen again
 Once golden brown, you let it cool....and then frost it.  I like to be festive and put coordinating colors to the holiday on top each time I make it.  So since it's Easter, I went with pink and blue sugar sprinkles....mainly because as hard as we looked, we couldn't find spring colored sprinkles anywhere.


frosted and sprinkled
 There has been a big debate over the years about the amount of frosting that gets put on the coffee rings.  My mom likes not a lot of it, my dad likes more of it.  I think it's safe to say that my sisters and I like more frosting on it as well, and since now that I'm making it, I always double the frosting.  My dad is happy, and I'm not sure if my mom has noticed....she never says anything about it.  Although now that it's on here, I'm sure she will say something about it.  Yes mom - I have doubled the frosting since I made it at Thanksgiving.  :) 


Wednesday, April 20, 2011

Peanut Butter-Chocolate Chip Oatmeal Cookies

Who says there aren't healthier cookies out there that taste good?  Try this one! Very tasty and the worst thing in it is the chocolate chips.  And really - who doesn't like a little chocolate each day? :)  One of my sisters has some dietary restrictions, so I found this cookie over a year ago in Martha Stewart's  Cookies Cookbook and tweaked it until perfect.  Easy to make and you wouldn't even know that it's healthy. 
I have switched things around to substitute for Splenda in the baking - and you can use whatever type of butter you want in this (believe it or not, diet butter - I Can't Believe It's Not Butter...types like that - are great for baking).  You can make it the normal way as well, and it's just as delicious. 


The batter is super simple, and believe it or not, it's mostly oats.  Once it's all mixed together, I add the most unhealthy part - the chocolate chips :)


look at all that dough

I do suggest not to snack on this raw dough.  The oats aren't cooked yet, so its really not a tasty dough to eat.  I scoop out each cookie with my trusty cookie scoop.....


they look small, but
bake up nicely


....and bake away.  These bake really quick and cool really quick as well.  Perfect ones to make if you have a short amount of time.


why hello


 Now, cookies don't really last long in my house.  My family usually picks cookies off the cooling rack as I'm making more.  Especially once my dad finds out there are cookies in the house.  :) 

Here's the recipe for the healthy version  :)

Peanut Butter-Chocolate Chip Oatmeal Cookies
makes about 6 dozen

3 cups old-fashioned rolled oats
1/3 cup whole wheat flour
1 tsp baking soda
1 tsp baking powder
1/2 tsp salt
1/2 cup pack brown sugar Splenda mix
1 cup Splenda
1 cup (2 sticks) unsalted butter - I Can't Believe It's Not Butter, Country Crock, or whatever non-butter version you use
1/2 cup natural peanut butter
2 large eggs
1 tsp vanilla extract
2 cup (12 oz) semisweet chocolate chips
  1. Preheat oven to 350 degrees.  Stir together oats, flour, baking soda, baking powder, and salt in a bowl.
  2. Put sugars, butter, and peanut butter in the bowl of an electric mixer fitted with the paddle attachment.  Mix on medium speed until pale and fluffy, about 5 minutes.  Mix in eggs and vanilla.
  3. Reduce speed to low.  Add oat mixture, and mix until just combined.  Mix in peanuts and chocolate chips.
  4. Using a 1 1/2" cookie scoop, drop balls of dough 2" apart on baking sheets lined with parchment paper.
  5. Bake cookies, rotating sheets halfway through, until golden brown and just set, 13-15 minutes.  (If you are making the healthy version - try baking 10-13 minutes, they do bake up faster).  Let cool on sheets on wire racks for 5 minutes.  Transfer cookies to wire racks to cool completely.  Cookies can be stored in airtight containers at room temperature for up to 2 days.

Monday, April 18, 2011

Peanut Butter Thumbprints

Randomly this week I had an idea - why not take the Chocolate Thumprint cookies that I love and make them peanut butter thumbrints?!  Genius!!  I went into the kitchen, hoping that my idea would work out well, and that I wouldn't have to report back to you that the experiment was an epic fail.   I just winged it - I had no real recipe and used the Chocolate Thumbprint recipe as a base recipe and added/subtracted some things. 

I was happy when the dough came together nicely.  It was super tasty, but a little too soft.  I'm not sure if it was the peanut butter that made it softer or if I need to add more flour to it next time.  I was worried that when I took them out of the oven they wouldn't be little round domes that they need to be.  But when it was time to take them out and make the imprints in the cookies, I was so happy to see that I did not mess up!

happy little cookies
I let them cool and got going on the ganache.  I didn't mess with this part, why bother?!  Once thickened, I poured away.  And I have to say, I miss my green bowl - that thing was the perfect size and the blue one I'm using in its place is too big.  I am on the hunt for the green bowl, hoping that its sold by itself and not just in the set of 3 that it comes with. 

chocolate and peanut butter - does
it get any better?!
I let the ganache set up and check on it a couple hours later.  The ganache stayed soft.  :(  FAIL!  I think its because of the peanut butter in the cookies that kept it from setting up right.  The recipe needs some major tweaking, but the cookies are delicious - soft ganache and all.  I sent Heays off to work armed with some to give to my taste testers there.  Both of my sisters are fans of these, even with my boo boos, so why wouldn't the boys be?

Friday, April 15, 2011

Pretty Doughnuts

I'm going to start this post off by saying that I love my friends.  You guys are amazing and continue to support me in so many ways.  I can't thank you enough.  So since I'm back in baking mode, there was one recipe I had to master - the doughnuts.  Now, last time they were not the prettiest things - thanks mainly to me not having any cookie cutters.

look at the ones on the bottom!!
so wrong
So my amazing friend at Arubula's Kitchen had sent me some cookie cutters - love you!!  :)  Yes - this is the same woman that I post about and rave about.  The doughnut recipe is from her - so go to her blog website as well people!!  It's informative and entertaining :)  Running Amuck with Arubula.  She is always my go to person when I have questions and we pretty much talk everyday, be it through text, facebook or phone (I do love when we do the trifecta). 

Now armed with my pretty cookie cutters (and I must say I love that they come in their own tin - that way I wont lose any, because lets face it, its me and I would lose some)

look at all those cookie cutters!!
(I think she got tired of me using shot glasses or whatever I had around to use as a cookie cutter - and here I was being inventive!) :)  Away I go cutting all the doughnuts up....let me tell you, so much easier when using the proper tools.  Common sense, right?!  I decided to go with all doughnut holes and went to town cutting away.  Then once chilled, it was time to fry.  And there was not one ugly doughnut in the batch. 

look at all those pretty babies!
Once I've got them all fried off, time to glaze them. 

glazed goodness
So - I snacked on them all day long.  These are truly addicting.  I made my sisters bring some in to work with them so I could get them out of my house.   My next attempt will be to make filled ones - and then I'm truly in trouble.  You will probably find me in the corner hiding with doughnut and filling all over my face and my sisters will have to pry the doughnut out of my hands.  If I make something twice, it means I'm a huge fan of it - and you should make it too. 

Wednesday, April 13, 2011

Rolo Stuffed Chocolate Chip Cookies

The same day I found the S'mores Cookie, I found this gem - Rolo Stuffed Chocolate Chip Cookies (really, check out My Baking Addiction - Jamie is amazing!)  Cookies with a Rolo inside of them!?  Printed it out and couldn't wait to make this!  I also called my dad to tell him about the new cookie I found.  His first words out of his mouth when I told him I found something new to bake was "Oh God.  What is it now?"  I replied "You are going to love me for this one - its a chocolate chip cookie with a Rolo stuffed inside of it".  And then my dad got all quiet and did his excited "OOOOOHHHH" remark that makes me laugh.  He was excited for it - I get my love of Rolos from him so I knew this was a no brainer to make. 

I froze the Rolos overnight and finally got going on my dough.  Then comes the fun part - scooping out the dough and rolling the Rolos into the middle of the dough.

a doughy pillow
of goodness
Then once, all rolled into large balls, I stuck the in the freezer to firm up before baking.

guess what?!  theres
a rolo in there! :)
Then bake away - 11 minutes later you get this

hello deliciousness
Once all cooled, of course I had to eat one - had to try it out.

gooey caramel
in the middle
SOO good.  My dad was a fan (shocking I know).  These are great to make ahead of time and just leave in the freezer until you're ready to bake them off.

Monday, April 11, 2011

S'mores Cookies

Believe it or not, I'm not a huge cookie person.  Yes I do like them, but if you gave me the choice of a candy bar or cake over a cookie, I would choose whatever was up against the cookie...unless the option was something I hate - then it would be a cookie all the way.  Specialty cookies are usually interesting, so when I saw this recipe I had to make them. I was searching around on My Baking Addiction for some recipes I haven't made yet when I saw this one.....Giant S'mores Cookies . I immediately printed it out.  Who doesn't like S'mores?!  It always brings me back to my childhood and summers - I still get excited for when summer rolls around and the idea of roasting marshmallows over a fire on the beach.  And I have to say - making these was so much fun!
This is an excellent kid friendly cookie to have them help you with.  They will have so much fun smooshing the marshmallows, chocolate bars and graham crackers into the cookies.  Let me suggest a short cut for you guys - the recipe calls for large marshmallows and for you to cut them up.  I suggest just buying mini marshmallows - such a time saver. I decided not to make them jumbo, just the size of my cookie scoop....excellent decision - so many cookies! :)

Now, the perfectionist in me was trying to make them all perfect and pretty before they went into the oven

hello :)
And then once I took them out of the oven, I saw that the more stuff there was on it and the better it was all smooshed together, the better they came out.


food porn shot :)


Once cooled, I couldn't wait to eat one!  Let me tell you - AMAZING!  They taste like a S'more! And my sisters and I can't stop eating them!  This is one that I will make again and again.  Run to the store - go get your supplies and bake these!!  You will not be dissapointed.  I acutally ended up making them again over the weekend because we went through them so quickly! 

Friday, April 8, 2011

Flourless Chocolate Cake

I've gotten a couple of requests to do a gluten free recipe.  I did some research and found some really good websites, and then put the information aside and kept telling myself I would get to it.  Then Ween called me and asked if I could make a cake for her coworkers birthday - and it had to be gluten free.  Perfect! Finally the motivation I needed to finally do that gluten free post!  And I had the perfect thing in mind.  I checked out a fantastic blog that is dedicated to all gluten free foods - its fantastic, everyone could get something out of it.  And of course, this is where I got my recipe from the Gluten Free Goddess.  (Another great website is Gluten-Free Desserts)  And when I saw the chocolate cake, it was perfect....who doesn't like chocolate cake?!  The recipe seemed to be easy, and I all needed was dark chocolate.  This was going to be so easy.

Not so much.  Let's just say I will never forget this day.  I had the chocolate broken into pieces already, but it needed to be chopped up, so I followed the recipe and did it in the food processor.  Now, we have an old, tiny one, and it works great! So I took that little guy out and started working in batches.  I was only on my second batch, and then all of the sudden, I smell it.  Something gross, and a something is burning smell.  I can feel the little guy is super hot, and then that's when I see it - smoke.  Smoke coming out of the food processor!! I quickly unplug it and empty the chocolate into the mixing bowl.  By now, the food processor is smoking - A LOT.  I flipped it over to see if I could get at the inside of it and saw that it was pointless to even try - I just put it on the kitchen floor and let it smoke itself silly. 

the culprit
It sat there on the floor, smoking for at least 30 minutes.  The smell, unfortunately, lasted much longer.  :(
So now that I've almost burned my house down, I turn my attention back to baking.  I throw the rest of the unchopped chocolate into a bowl - my green, warped one from the brown butter icing incident - and stick it in the microwave to melt it.  HUGE MISTAKE! Apparently the bowl didn't want to go into the microwave and when I took it out, the part that had previously melted was plyable.  :(  Time to throw away my favorite bowl. (Don't worry, it didn't do anything to the chocolate)  Luckily I have 2 more as back ups, but this one was the perfect size.


the melted part

inside the bowl

So now I'm down 2 kitchen items, and all I can do is hope that this thing doesn't explode inside my oven.  I fill up the springform pan with the batter.....


the batter was very tasty
and bake it off.  I am very happy to report that no cake exploded or anything burning happened! A perfect cake emerged and I was happy that I had gotten through this. 

looks fantastic!
I could of definatley used a drink after this experience.  I rank it right up there with the yeast incident.  But learn from my boo boo people - just melt the chocolate in the microwave in a non-warped bowl - it will be so much easier. And on the bright side of things, I get to go shopping for a new food processor! :)  Here's the link for the recipe :)

Flourless Chocolate Cake

I sent Ween off to work with the cake, praying that everyone, especially the birthday girl, would like it.  It's kind of nerve wracking when you send someone off with something you've never made or tasted before for a bunch of people to eat.  But they were excited when I said I would bake something - I hope I didn't let them down.  I hear from Ween later in the day and the cake was a hit!  So excited and happy that it went over so well. 

Thursday, April 7, 2011

Chocolate Mint Cupcakes

I found this on Savory Sweet Life and I highly recommend it! I made it the other day and my whole family loved it.  Easy and delicous cupcake with Andes Mints in them - who wouldn't like that?  Sign me up.  The batter was really easy to make - and the hardest part (and most tedious) was unwrapping all of those damn mints.  So I fill each cupcake up in the tins and then place a mint in the center

chocolate in chocolate
oh yeah

Then I press gently down on each mint to make sure that the mint is covered by the batter and off they go into the oven to bake.  Take them out and cool them off and then I get going on the frosting. 

Now, I love frosting.  A good frosting is a weakness of mine.  When one of my best friends got married over 6 years ago they had a great cake - with amazing frosting.  We still talk about that frosting to this day.  I'm a fan of the frosting that goes with this cupcake.  Chocolate Mint frosting.  Creamy and fluffy and not too strong in the mint department - personally sometimes I think that can kill a good cake or brownie or whatever it is if the mint is overpowering.  And it made A LOT of frosting, I had some left over.  Of course I had to eat some on it's own :)  I scoop it into a large ziplock bag and cut the corner and pipe away.  Then I had a bowl of chopped up mints waiting for me to top the cupcakes and sprinkled away.

delicious
Now, the only poo poo moment in this was when we went to eat them - the mint had fallen to the bottom and kinda stuck the paper liners of each cupcake :(  But they are delicious and no one seemed to mind.  I'm going to work on a way to have that not happen next time I make these - and there will be a next time :)

Wednesday, April 6, 2011

Double Chocolate Cupcakes

I was with my dad for our last full day together, and since he is recovering so nicely I brought over a cookbook (100 Best Delicious Chocolate) and let him pick out a treat for me to make.  After careful consideration, he chose a good one.  We didn't have everything for it - it was just the frosting part that we didn't have, but I said I could improvise and make a better one.  And I totally did. 

It only makes 12 cupcakes, so I thought perfect, nothing too big incase it's not that great.  I got going on baking - and I before you know it they are baking away in the oven. 


before baking
Once all baked off - time to cool. 


naked cupcakes
So the frosting calls for white chocolate - I had used all that we had inside the cupcakes - and I wasn't going to go out and get more for this.  My mom had plenty of regular chocolate in the house so I just whipped up my own frosting.  I put 2 different kinds of chocolate and some butter in a bowl and metled it away.  Then I spooned it over the tops of each cupcake and then sprinkled some mini chocolate chips ontop to make them look cute.


dont these look good?!
Once the chocolate was set, my dad and I split one.  I'm not really a fan of cinnamon in my chocolate, but these were pretty tasty.  Heays is a huge fan of these - she said the more you eat them, the better they are.  So if you are looking for something different, give these a try.   Quick and easy. 

Double Chocolate Cupcakes
makes 12

scant 1 1/2 cups all purpose flour
1/3 cup unsweetened cocoa, plus extra for dusting
1 tbsp baking powder
1 tsp ground cinnamon
1/2 cup superfine sugar
6 1/2 oz white chocolate, broken into pieces or chips
2 large eggs
1/3 cup sunflower or peanut oil (i used vegetable oil and it worked just fine)
1 cup milk

  1. Preheat the oven to 400 degrees.  Line a 12 cup muffin pan with paper liners.  Sift the flour, cocoa, baking powder and cinnamon into a large mixing bowl.  Stir in the sugar and 4 1/2 oz of the white chocolate.
  2. Place the eggs and oil in a separate bowl and whisk until frothy, then gradually whisk in the milk.  Stir into the dry ingredients until just blended.  Divide the batter evenly among the paper liners, filling each three-quaters full.  Bake in the oven for 20 minutes, or until well risen and springy to the touch.  Remove from the oven, let cool in the pan for 2 minutes, then remove and place them on a cooling rack to cool completely. 
  3. Place the remaining white chocolate in a heatproof bowl, set the bowl over a saucepan of barely simmering water, and heat until melted.  Spread over the top of the cupcakes.  Let set, then dust the tops with a little cocoa powder and serve.

Monday, April 4, 2011

Brown Sugar Pound Cakes

I have been having some personal issues that needed legal action - and one of my friends was so helpful. I couldn't of done what I did without him.  So to thank him, I decided to make some treats for him and his wife.  He said it wasn't necessary, he was just glad to help out a friend.  But he had helped me so much I felt like I had to repay him the best way I knew how.  I emailed his wife to see if she would be at work so I could drop off the treats (unknown to him), and when I heard back that she would be working, I got to baking.

Now, I didn't know what to make - chocolate? Peanut butter? Coconut?  Some people are really picky with treats - so I figured go simple and with something that everyone likes - pound cake.  Pound cake in the shape of cupcakes :)  I pull out my Martha Stewart's Cupcakes Cookbook and get to baking.

Super simple batter - really can't go wrong with a pound cake recipe.  All ready to go


look at all the batter!

I scoop it out into the cupcake tins


ready to go into
the oven
And I bake them off.  Once all cooled and ready to get frosted - I get excited.  I LOVE this frosting.  It's so good.  My dad is a HUGE fan of it.  It's a brown butter frosting.  Basically you burn some butter - and it's fun doing it.  I get the butter to a nice brown color and then pour it into a bowl.


that bowl will never
be the same

Clearly, I wasn't thinking because I poured it into a plastic bowl I use all the time.  The butter was super hot - and warped my bowl a little bit :(  So now it looks fat and pregnant, but still good to be used.  I add everything to the butter and the frosting is ready! Spoon a little over each cupcake and then let the frosting set a little.


Sinfully good
  
Here you go my Yeasties! Bake away :)

Brown Sugar Pound Cakes
makes 28

3 cups all purpose flour
2 tsp baking powder
1/2 tsp salt
2 sticks (1 cup) butter, room temp
2 1/4 cups packed light brown sugar
4 large eggs, room temp
3/4 cup buttermilk
Brown-Butter Icing

  1. Preheat oven to 325 degrees.  Line standard muffin tins with paper liners.  Whisk together flour, baking powder and salt.
  2. With an electric mixer on medium-high speed, cream butter and brown sugar until pale and fluffy.  Add eggs, one at a time, beating until each is incorportated, scraping down sides of bowl as needed.  Add flour mixture in 3 batches, alternating with 2 additions of buttermilk, and beating until combined after each.
  3. Divide batter evenly among lined cups, filling each three-quaters full.  Bake, rotating tins halfway through, until golden brown and a cake tester inserted in centers comes out clean, about 25 minutes.  Transfer tins to wire racks to cool 10 minutes; turn out cupcakes onto racks and let cool completely.  Cupcakes can be stored up to 3 days at room temperature, or frozen up to 2 months, in airtight containers.
  4. To finish, place cupcakes on a wire rack set over a baking sheet; spoon icing over cupcakes and let set.  Cupcakes are best eaten the day they are glazed; keep at room temperature until ready to serve.

Brown-Butter Icing
makes 1 cup

1 stick (1/2 cup) unsalted butter
2 cups sifted confectioners sugar
2 tsp vanilla extract
2 tbsp milk, plus more if needed

  1. Melt butter in a small saucepan over medium heat, swirling pan occasionally, until nut-brown in color, about 10 minutes.  Remove from heat, and pour butter into a bowl, leaving any burned sediment behind.
  2. Add confectioners sugar, vanilla and 2 tbsp milk to brown butter; stir until smooth.  If necessary, add more milk (up to 2 tbsp) a little at a time, just until icing is spreadable.  Use immediately.