Thursday, March 31, 2011

Truffle Brownies - take 2

OK - so on my list of things to make perfectly is those Truffle Brownies that I made before.  I had messed up the ganache by not letting it set properly :(  And I knew better, and it was still tasty, but the failure was still haunting me. 

runny ganache
:(
I had a request for these, so I needed to do a trial run before to make sure they were perfect this time.  And I had some fantastic volunteers to be my taste testers.  Away I went baking, and making some small changes to the recipe.  Brownies were baked off and cooling and looked wonderful! Now on to my arch nemesis.  I was going to get this right - there were no questions about it.  I heat up the cream and pour it over the chocolate and let it do its thing.  45 minutes later - great ganache! SOOO HAPPY!!  I pour it over the brownies and toss that bad boy in the fridge.  Then when it was time to go see my lucky taste testers, I cut up the brownies and off I went with my sister. 

Now, bringing treats to boys is always fun - they get excited no matter what it is.  So it's always amusing to see what their reaction will be - and I love the feed back they give me so I happily bring them treats at least once a week now.  Let's just say the reaction was good.

delicious :)
It was really good.  Happy campers all around.

yum
So yes, to all of you in blog land, I did master this one! I didn't let it win - and happily am going to make them again and again knowing that I will make it right :)  It's a good day.

Tuesday, March 29, 2011

Homemade Twix

I was sitting there with my dad the other day, and he looks at me with sad eyes and then asks "What are you going to make today? All of the cookies are gone" And then he does his sad face.....how could I say no?!  I wasn't prepared and didn't bring any of my cookbooks so I started looking through what my parents had for cookbooks.  I found a cookbook I had given to my mom, "The Golden Book of Baking", because it had a misprint in it and I had gotten a new one so I knew we could find something in there to make. And then I found it - a version of how to make a Twix bar - but they call it Chocolate Caramel Squares.  I knew this was going to be good to make, because I get my love of caramel from my dad.  I actually had this recipe marked off to make in my book at home so I was super excited to finally make it.

Thankfully my mom had still left her stand mixer out so I get going on the cookie base.  Always easy to make and its ready to bake before I know it.  Now, the recipe says to line the pan with tinfoil, and I did.  But as I found out the caramel really sticks to the foil and doesn't want to let go, so I suggest using parchment paper instead - that's what I plan on doing next time I make these.

cookie base
Once that's baked off and cooled, I get going on making caramel.  This part was really fun for me.  I love caramel and I've never really made it before - always took some short cuts.  It is a super rich and tasty caramel - I'm a fan of it.

bubbling away
Once its been simmered and cooled a little, I pour it over the cookie base and spread it out.  This is where I find out that it likes the tinfoil - a lot.  I finally got the idea to smoosh all the foil against the pan but that didn't really help either.  Parchment paper is the way to go my friends.

oh yeah :)
Once the caramel set up, I melted some chocolate and poured it on top.  Sadly I didn't use enough chocolate so some of the edges didn't have enough to cover the top :( But it was still delicious.


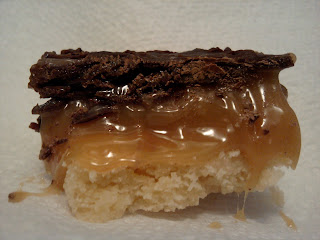
yum yum
Now there are things that when I make this again I'm going to change, like using more chocolate and doubling the cookie base because the caramel just overpowered everything else.  But it was amazing anyways.  I kept it in the fridge or freezer so the caramel wouldn't melt all over the place.  I had brought some of these in to a few of my sisters and mine favorite people at a local bar/restaurant and when they opened it up they were too funny - it was like little kids opening presents on Christmas Day.  I wish I had taken a picture of it.  But they were huge fans of the treats.

oh yeah - food porn shot :)
Here's the recipe.  I highly suggest this one!!! :)

Chocolate Caramel Squares
makes 16-20 bars

Cookie Base:
1 cup all purpose flour
1 tsp baking powder
1/8 tsp salt
1/2 cup butter, room temp
1/4 cup sugar

Caramel Topping:
1/2 cup butter, cut up
1/2 cup sugar
2 tbsp light corn syrup
1 can (14 oz) sweetened condensed milk

8 oz chocolate, dark or milk, whatever you prefer, coarsely chopped

  1. Cookie Base:  Preheat the oven to 325 degrees.  Line a 9" square pan with aluminum foil (trust me - use parchment paper!)
  2. Combine the flour, baking powder and salt in a large bowl.  Beat the butter and sugar in a large bowl with an electric mixer at high speed until pale and creamy.  With mixer on low speed, beat in the dry ingredients.
  3. Spread mixture evenly in the prepared pan.  Bake for 10-15 minutes, or until golden brown.  Let cool in the pan on a rack.
  4. Caramel Topping:  Melt the butter with the sugar, corn syrup and condensed milk in a medium saucepan over low heat, stirring constantly.  Bring to a boil then simmer gently for 5 minutes.
  5. Remove from heat and let cool slightly.  Spread the caramel topping evenly over the cookie base.
  6. Melt chocolate in a double boiler over barely simmering water.  Pour the chocolate over the caramel topping and let stand for 1 hour or until set.
  7. Cut into bars

Thursday, March 24, 2011

Chicken Piccata

I've been taking care of my dad during the day while my mom is at work.  It's been fun - I haven't had a lot of quality time with my dad lately so it's nice.  And since my attempt at making something for the first time since surgery went over so well, I made dinner for my parents and myself as well.  Apparently, my mom had decided what we were having and had left the recipe out for me on the kitchen counter.  Chicken Piccata.  Right on! Easy and delicious - and I came armed with my last box of Beer Bread Mix from Tastefully Simple

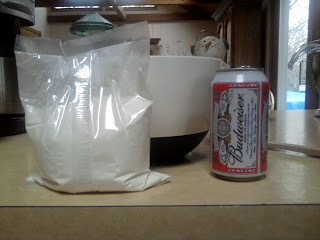
I get going on the bread first, it honestly doesn't take much effort.  And this was the last time I plan on making bread from a mix since I am now ready to take on the bread making world.  I pour a can of beer into the bowl and then add the mix....its really that simple.

this is as hard as it gets
All ready and I put the bread into the oven to bake.  I get going on the chicken.  Now, you have to pound it out to make it thin, and I always find this part fun and very theraputic.  So there I am in my parents kitchen, pounding away at chicken and singing a song.  I must of pounded the crap out of the chicken because by the time I was done, my forearm was killing me. 

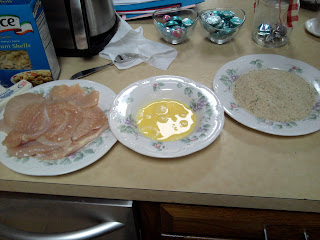
Next I set up my station for wet and dry ingredients.  It's best to use one had for dry and one hand for wet, that way you wont get a clumpy mess on your hands while dipping and breading.

assembly line
Once I had all the chicken dipped and breaded, I got the water going for the pasta and went to work on frying up the chicken.  Now, let me just say that yes, I did indeed end up using a whole stick of butter to cook the chicken in.  Gross? Yes.  Tasty? Absolutely! You can always switch out the butter for whatever you want to cook the chicken in.  I cook the chicken in batches and then put the finished ones in the oven to keep warm.  Once all the chicken was cooked, I get to work on the sauce.  So simple and easy.  My mom came home and we had a chat about what to do with the sauce and we decided to throw the pasta in the pan and coat it with the sauce.  So good.

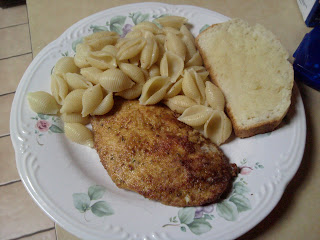
Everything was ready and it was time to eat.  I must say, it was delicious.  And it made a ton so we had left overs for days.  But if you are looking for something easy and quick, I highly suggest this.


Delicious :)


  Chicken Piccata

1 1/2 cups bread crumbs
1/2 tsp salt
- mix together and put on large plate or rimmed pan
1 egg
1 tbsp milk
- beat in rimmed bowl or plate
butter
1/2 cup chicken stock
1/4 cup dry white wine
1 tbsp lemon juice
1-2 pounds of chicken
Pasta or rice as side
  1. Pound chicken thin with kitchen mallet.  Dip chicken in egg mixture and then into bread crumb mixture. 
  2. Heat up large skillet pan with 4 tbsp butter.  Brown chicken on each side.  Remove from pan when done and set aside.  Add butter as needed with each batch of chicken.
  3. Sauce: to drippings in pan, add stock, wine and lemon juice.  Heat until boiling.  Simmer, covered for 5 minutes.  Spoon over chicken or add to pasta. 

Tuesday, March 22, 2011

Back in the kitchen!

Almost a month without baking!! Or being in the kitchen making anything at all!  Too long if you ask me.  Yesterday I happily returned to the kitchen in full force and got my bake on! I was a little rusty but it was so good to be back doing what I love.  And so happy that I'm somewhat ambidextrous because I'm still having issues with my right hand.  So I thought I would take it easy and make something everyone loves, chocolate chip cookies.  My go to recipe for this has been and always will be on the back of my Nestle Chocolate Chips - the recipe never fails :) 

I was at my parents house all day, helping my dad out who is recovering from getting both of his knees replaced, and my mom had left me the stand mixer out.  Thank you whoever invented the stand mixer at KitchenAid - I truly do love you.  I wouldn't be able to bake without it, and quite frankly, I don't know how I lived without it before I got one.  I will never use a handheld mixer again, and not just because I can't hold it in my hand because of my injury.  If you have been on the fence about investing in one, I highly suggest it.  It's totally worth the money - and now with all the attachments that they make for it the machine is even better!

I get going on the dough and am happy to be baking again.  And soon will come my favorite part, to add the chocolate chips - so I can snack on the dough of course while I bake :)

can't resist trying a bite or two :)
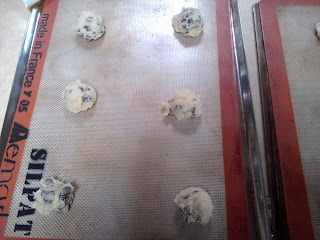
I get out the cookie scoop (another great invention) and scoop them out onto the pan lined with my Silpats (which is SOOO worth the $20 a sheet)

ready to go into the oven

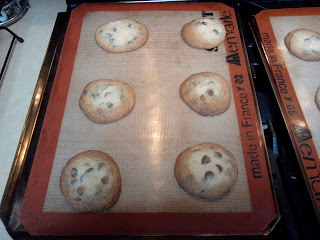
About 10 minutes later, I've got delicious cookies waiting for me!  Now, not all of them turned out great, I'm a little rusty and my mom got new pans that I hadn't baked on before, so some of the cookies turned out extra crispy, but still good.

YUMMIES!
It was a good day - so happy to be back and doing what I love.  I even made dinner last night too (post will be coming soon).  I can't wait to start making things again - on my list of things to tackle is to master bread making and the truffle brownies I had messed up before (especially since I got a request for them for someones birthday) and some gluten free recipes for some friends of mine that made requests for some good gluten free items.

So happy to be back in action! And if there is something you would like to see on here, please let me know! I love trying out new recipes!

Sunday, March 20, 2011

Chocolate Shortbread Fingers

I found this recipe when I was looking at the recipe for Cinnamon-Raisin Bread.  I do love shortbread, and clearly I'm a chocolate lover, so why not give this one a try?!  I pulled out my Martha Stewart's "Baking Handbook" Cookbook and got to work early this morning.  I love baking in the morning....puts me at ease and makes my day start off great.  I had my breakfast (coffee and fresh cinnamon-raisin bread) and was ready to get my bake on. 

My stand mixer is always waiting for me on the kitchen counter, ready to go.  I pull it out and toss some butter (lots of it actually - this is a shortbread recipe after all), add some sugar and let it get all fluffy.  I love when you mix butter and sugar together and it gets fluffy, I'm not really sure why, but it always is really cool to me.  Once everything is all mixed together,


yummy dough

I put the dough in a pan and stick it in the freezer to firm up. 

chilled dough
Now, I don't know if I wasn't really paying attention to the time or if the news just sucked me in this morning, but I let it stay in the freezer a little too long - which wasn't a problem.  It only took 10 more minutes to bake because it was that cold.  Next time I will set a timer, or put it in the fridge to chill instead of the freezer. 
They turned out looking great! Once they are all baked, I cut them into pieces and then sprinkled some sugar on top and let fully cool.

not the prettiest things ive done
OK - maybe I got a little carried away with the sugar - not on purpose. I go meet Heay's for lunch and then she brings them in for the boys she works with.  They didn't last long - for once they see her with treats from me, they get excited.  And they know I love feedback - and they all told Heays to tell me they were great!
So if you are looking for a quick treat that doesn't take a lot of time or effort, this one is a winner :)

Chocolate Shortbread Fingers
makes 22 fingers

3 sticks (1 1/2 cups) unsalted butter, room temperature, plus more for pan
2 1/2 cups plus 2 tbsp all purpose flour
4 1/2 tbsp dutch process cocoa powder
heaping 1/2 tsp ground cinnamon
1/2 tsp salt
1/4 tsp baking soda
1 cup superfine sugar
granulated sugar, for sprinkling

  1. Preheat oven to 325 degrees.  Butter a 12x8" rimmed baking sheet, and line with parchment paper, leaving a 1" overhang on long sides; set aside.  In a medium bowl, whisk together flour, cocoa, cinnamon, salt, and baking soda until combined.
  2. In an electric mixer fitted with paddle attachment, beat the butter and superfine sugar on medium-high speed until light and fluffy, 3-4 minutes, scraping down the sides of the bowl.  Add flour mixture, and beat on medium speed until just combined. 
  3. Using a small offset spatula, evenly spread dough in prepared baking sheet.  Chill in the freezer or refrigerator until dough is firm, about 15 minutes.  Prick dough all over with a fork; bake until just firm to the touch, about 20 minutes.  Transfer to a wire rack.  While still hot, use a large knife to cut shortbread into 4x1" pieces.  Sprinkle with granulated sugar.  Cool completely in the pan. 

Tuesday, March 15, 2011

Caribbean-Style Pork Roast with Cranberry-Apricot Cornbread Stuffing

 Here is a guest post from my sissy.   I'm so happy she did a post for me.  I think it turned out great - she is a much better cook than she gives herself credit for!
Day 1: I made the cornbread and let it cool on the rack overnight, along with a few slices of wheat bread. I put together the marinade for the pork roast.....after all, the longer it sits in the yummy marinade, the tastier it is right?
Day 2: I got the roast out of the fridge and let it come to room temp before putting it in the oven. Got out the raspberries and an orange for the dessert and got that mixture ready to go and chilling in the fridge. Sliced up the wheat bread and cornbread and got the "stuffing juice" ready for it. Warming up apple juice, cranberries, apricots, and a cinnamon stick on the stove smells SO good!  Once the stuffing and the roast were in the oven, I put the frozen-yogurt mixture in my nifty new ice cream maker, loaded it up with ice and salt and let that do it's thing.  After about 30 minutes, the frozen yogurt was ready, I put it in a freezer-safe container and let it firm up for about 2 hours.
The dinner was super tasty, and dessert.....as always....was the best part.

Pork Roast Marinade:
(this recipe is for a 1lb. roast, so times it by how big your roast is, mine was 4lbs.)
Grated zest and juice of 1 orange
Grated zest and juice of 1 lime
1 tsp olive oil
2 garlic cloves, minced
2 tsp ground cumin
1/2 tsp salt
1/4 tsp black pepper
Pinch of cayenne
Let roast marinate for at least 2 hours, overnight is best. Preheat oven to 350
Place roast in roasting pan, if you don't have a lid, cover it with aluminum foil.
Cook roast until it reaches a temp of 160. Once done, let roast stand on cutting board for 5 minutes before slicing.
Note: If you'd like, you can serve the roast with some fresh sliced pineapple sprinkled with chopped cilantro and a tiny bit of cinnamon.


mmmmmm


Cranberry-Apricot Cornbread Stuffing:
(I used the cornbread recipe on the box of the cornmeal)
3 scallions, thinly sliced
2 tbsp fresh dill
1/2 c dried apricots, chopped
1/2 c dried cranberries
1 cinnamon stick
2 c apple juice
4 slices wheat bread
Add scallions and dill to cornbread mix and cook as directed. For best results, let the cornbread and the wheat bread dry on a cooling rack over night. In a sauce pan, add apple juice, apricots, cranberries, and cinnamon stick.  Bring to a boil, then reduce heat and let simmer until the liquid is reduced by half, about 5-10 minutes. Slice wheat bread and cornbread and place in a bowl, add apple juice mixture and combine well. Preheat oven to 325.  Place stuffing in baking dish and cook until golden brown (about 40-50 minutes).
Note: I warmed up an additional 2 cups of apple juice and another cinnamon stick (separate) and added a little bit more at a time to the stuffing mixture. I thought the recipe would be too dry for my taste, and it turned out perfect....again, for my taste.


dry ingredients

wet ingredients

finished cornbread :)
 Raspberry-Orange Frozen Yogurt
3 (6 oz) containers of raspberries (you could use frozen ones too)
1 c sugar
Grated zest of half an orange
2 tbsp orange juice
Pinch of salt
1 c vanilla yogurt (your choice)
1 c half-and-half
Combine raspberries, sugar, orange zest, juice, and salt; let stand for about 30 minutes, stirring occasionally.  Meanwhile, whisk together yogurt and the half-and-half until smooth, add to the raspberries. Cover well and refrigerate for about 2 hours
Pour yogurt mixture into ice cream maker, and freeze according to manufacturer's instructions.  Transfer to a freezer-safe container and freeze until firm, about 2 hours. The yogurt is best served within one day.
Note: I blended the raspberry mixture in the blender before letting it chill in the fridge, that way it didn't clog up the ice cream maker and it had a nice smooth texture.

nummies

Friday, March 11, 2011

Chocolate Mousse

Here is another one from AD.  Chocolate Mousse has always been one of my favorites.  Now if you're thinking I can make a great one from a box mix, please don't.  They never seem to turn out right.  I don't know if it's just me, but if its super easy and comes from a box, I always mess it up.  I can't even make instant pudding - I'm not kidding. My sisters have banned me from ever making it again - it turns out too thin or runny....how can I mess it up?!  All you do is add milk and stir.  But yet I somehow mess it up.  So no more instant things for me, always make it from scratch.  So here's an easy mousse recipe :)

Dessert: friendly enough for a gluten intolerant friend.  I started out making a flourless chocolate torte but it was a new recipe and it wasn't a trusted source.  After 30 minutes in the oven, I knew something was wrong so I decided to abandoned it and go with something I knew was fail proof…..hmmm….bananas foster or chocolate moussse?  I went with the mousse.  This is one of the easiest mousse recipes ever:
3 1/2 ounces bittersweet chocolate (60% cacao)
3 eggs, room temperature, separated
2 1/2 teaspoons sugar
Pinch of salt
3/4 cup chilled heavy whipping cream

Melt chocolate in doublle boiler.  Remove bowl from water, add yolks and whisk.  In mixer, beat egg whites with a pinch of salt to soft peaks.  Gradually add 1 1/2 teaspoons sugar.  Beat constantly until medium, firm, glossy peaks form.  Fold 1/4 cup of beaten whites into the chocolate mixture until incorporated and then fold in the rest of the whites. Divide among four bowls, cover and chill at least 4 hours or overnight.  Before serving, beat heavy cream with 1 teaspoon sugar until peaks form.  Top mousse with cream, garnish with berries or shaved chocolate.

mmmm....mousse!! Light
and fluffy :)


Wednesday, March 9, 2011

Recipe Cards

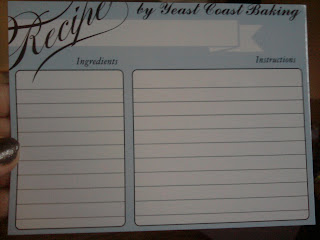
I have some of the best friends in the world - I swear I do!  I got home yesterday after a very long and exhausting day to find the best present EVER waiting for me on my kitchen table.  I rip into the package and see it - Recipe Cards! Recipe cards with Yeast Coast Baking on it!  I was ecstatic to say the least.  I immediately text Kate to thank her profusely.  Then I find out she designed them herself! Made me love them that much more!  The way she set them up is how I would of set them up - great minds think alike :) Now if you are sitting there reading this and thinking "wow this girl is a giant nerd and gets excited about things way too easily" then you are correct.  Points to you :) I love to bake - obviously - that's why I started this blog.  But the amount of support I have gotten from you that read this and family and friends is amazing to me.  I feel so honored and loved.  Ok - enough mushy stuff. 

Needless to say, I can't wait to write out a recipe on one of the cards and give it to someone. 


Best Recipe Card EVER!


Thursday, March 3, 2011

From Utah with love

Last week I got surgery to fix a nerve problem in my right elbow.  I've been home recovering and doing well.  Friday of last week I got the best package ever from my sissy in Utah.  Ok, she's not really related to me, but she might as well be.  We talk everyday through texts and she had spilled the beans earlier that a package was on its way to me.  I was so excited when it came! I never get things in the mail that I actually want....and the box it came in was huge!

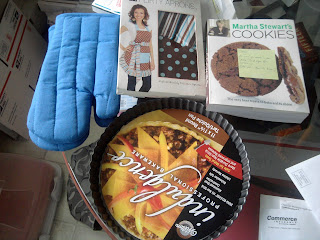
I opened it up and was so excited - she had gotten me baking supplies!!

look at all those goodies!
The card was signed by her kids who drew me some nice pics and then a nice note, and part of it made me laugh about her packing the box with the obits part of the paper and feeling kind of bad about it.  But it was full of things I loved.  A new set of oven mits - because I have destroyed the set I have now.  They are all burned on the edges and have so many stains on them.  A tart pan!!  Always wanted one, never bought one - now I can't wait to use it and make something!  A nifty new apron - mine is so stained its not even funny.  And the best part of all - a new cookie bible since mine is slowly dying.  I now no longer have to worry about when the book will finally bite the dust and about getting a new one. 

Thank you so much sissy! You are the best!