Friday, September 30, 2011

S'mores Cupcakes

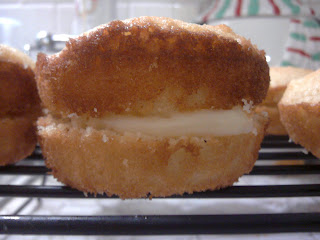
S'mores in a cupcake - yep, they taste like a S'more.  Graham cupcake with a chocolate ganache and then a marshmallow frosting that gets browned - it's pretty cool.  Plus I got to try out a kitchen torch, but we'll get to that in a little while.  Of course there's a story with it.  :) Yes, this does have a lot of steps to it, but they are really the cutest things when done - and a crowd pleaser. 

lightly browned and all ready to eat
The cupcake itself is easy.  They bake off nicely and once all cooled then the fun stuff begins.  Chocolate Ganache comes first.  It may look like you might not have enough for the 2 tsp on each cupcake, but you do. 

looks good
Once you are all done with those, time for the frosting.  Then put it in a giant ziplock bag when its ready and pipe away.


all piped and waiting to be toasted
After they are all piped, I do my dishes so the frosting has time to harden a little.  It doesn't take long since it's marshmallow, so by the time I'm done it's time to char them :)  I'm excited.  I borrowed my parents kitchen torch and had never used one before.  And my mom wasn't too sure how to use it, its been years since she's used it. 


nothing good can come from this
So I fill up the torch with the fuel and then tried my hardest to get a flame to light that thing.  Nothing....no matter what I did would light it.  I must of tried for 5 minutes straight and it just kept blowing gas out of the torch and not lighting when I would put a flame near it.  I gave up out of fear that I would blow my house up and decided just to stick the cupcakes on a cookie sheet and stick them under the broiler in the oven.  It doesn't take long to brown them in the oven so keep your eye on them. 

A little sad that I didn't get the torch to work, I happily set out to drop these off.  Huge hit.  People were excited to see them.  Who doesn't love a S'more?! 


S'mores Cupcakes
makes 24

1 1/2 cups all purpose flour
1 1/3 cups graham cracker crumbs
2 tsp baking powder
1 1/2 tsp salt
1 1/2 tsp cinnamon
1 1/4 cup (2 1/2 sticks) butter, room temp
2 cups packed light brown sugar
1/4 cup milk
6 large eggs
2 tsp vanilla extract
Chocolate Ganache
Seven Minute Frosting

  1. Preheat oven to 350 degrees.  Line standard muffin tins with paper liners.  Whisk together flour, graham cracker crumbs, baking powder, salt and cinnamon.
  2. With an electric mixer on medium-high speed, cream butter, brown sugar and milk until pale and fluffy.  Reduce speed to medium; beat in eggs and vanilla, scraping down sides of bowl as needed.  Add flour mixture; mix until just combined.
  3. Divide batter evenly among lined cups, filling each about three-quarters full.  Bake, rotating tins halfway through, until golden brown and a cake tester inserted comes out with only a few moist crumbs attached, about 25 minutes.  Transfer tins to wire racks to cool 10 minutes; turn out cupcakes to let cool completely. 
  4. Spoon 2 tsps chocolate ganache onto each cupcake.  Fill pastry bag with frosting and pipe each cupcake; swirling tip and releasing as you pull up to form a peak.  Hold a small kitchen torch 3 to 4 inches from surface of frosting, and wave it back and forth until frosting in lightly browned all over.  
Chocolate Ganache Glaze

6 oz semisweet chocolate chips
2/3 cup heavy cream
1 tbsp light corn syrup

  1. Place chocolate in a medium heatproof bowl.  Bring cream and corn syrup just to a simmer in a small saucepan over medium-high heat; pour mixture over chocolate.  Let stand, without stirring, until chocolate begins to melt.
  2. Using a flexible spatula, gently stir in chocolate and cream until totally combined; begin near the center of the bowl and gradually work your way toward the edge, pulling in as much chocolate as possible, until the mixture is smooth and glossy.  Use immediately.
Seven Minute Frosting

1 1/2 cups plus 2 tbsp sugar
2/3 cup water
2 tbsp light corn syrup
6 large egg whites, room temperature

  1. Combine 1 1/2 cups sugar with the water and corn syrup in a small saucepan; clip a candy thermometer to the side of the pan.  Bring to a boil over medium heat, stirring occasionally, until sugar dissolves.  Continue boiling, without stirring, until syrup reaches 230 degrees F.
  2. Meanwhile, in the bowl of a standing electric mixer fitted with the whisk attachment, whisk egg whites on medium-high speed until soft peaks form.  With mixer running, add remaining 2 tbsp sugar, beating to combine.
  3. As soon as sugar syrup reaches 230 degrees, remove from heat.  With mixer on medium-low speed, pour syrup down side of bowl in a slow, steady stream.  Raise speed to medium-high; whisk until mixture is completely cool (test by touching the bottom of the bowl) and stiff (but not dry) peaks form, about 7 minutes.  Use immediately.  

Thursday, September 29, 2011

Peanut Butter Cupcakes

Peanut Butter Cupcakes - yep....they are that good.  And the recipe calls for a peanut butter frosting as well, but I wanted to change it up and put a rich chocolate ganache on top of these - and it made it so good. It's like a cupcake form of a peanut butter cup.  And who doesn't love those?! This is an extremely easy recipe (who doesn't like that?!) and comes together quickly and before you know it, they are baking away in the oven, the smell of peanut butter filling your house.  Once they are all baked off and cooled, time for the frosting.  We all know I'm a huge fan of chocolate, so this comes as no surprise.  I just thought that a peanut butter frosting on top of a peanut butter cupcake would be too much of one taste, why not mix it up?  A teaspoon of chocolate ganache on top of each of them and then let set - all done.  An easy and delicious cupcake, sure to please anyone.

yes please
I dropped them off to my Tuesday Taste Testers, and one just couldn't wait and had to eat one infront of me....amazing she said!  And every time some one new ate one, they all said the same thing "OMG".  If you make these, you will be a hit!

Peanut Butter Cupcakes
makes about 30

1 3/4 cups all purpose flour
1/4 tsp baking soda
3/4 tsp baking powder
1/2 tsp salt
3/4 cup (1 1/2 sticks) butter, room temp
1 1/3 cups granulated sugar
2/3 cup creamy peanut butter
3 large eggs
1/2 tsp vanilla extract
1/2 cup sour cream
Ganache:
6 tbsp butter
6 oz semi sweet chocolate chips
2 tsp light corn syrup

  1. Preheat oven to 375 degrees.  Line standard muffin tins with paper liners.  Whisk together flour, baking soda, baking powder and salt.
  2. With an electric mixer on medium-high speed, cream butter and sugar until pale and fluffy.  Reduce speed to low.  Beat in peanut butter until combined.  Add eggs, one at a time, beating until each is incorporated, scraping down sides of bowl as needed.  Beat in vanilla.  Add flour mixture, and mix until just combined.  Add in sour cream.
  3. Fill each lined cup 2/3 way full.  Bake, rotating tins halfway through, until pale golden and a cake tester inserted in centers comes out clean, about 13 minutes.  Transfer tins to wire racks to cool completely.
  4. Make ganache: Melt butter, chocolate and corn syrup in microwave safe bowl.  Stir until chocolate is smooth and fully melted.  Let stand 10 minutes to thicken.  Spoon a tsp of ganache ontop of each cupcake and let set. 

Wednesday, September 28, 2011

Chocolate Root Beer Cupcakes

I know what you're thinking - really?! Root Beer in cupcakes?!  It seemed kind of odd to me too, but they are delicious and super moist.  The root beer actually balances the chocolate out in this cupcake, I highly suggest making these.  Root Beer is in it everywhere, in the cupcake batter, then you pour some on top of the cupcakes when they get out of the oven and then there is root beer in the glaze that goes on top.  It all works fantastically together.  It doesn't matter what brand of Root Beer you use, but the stronger the root beer flavor, the more it will shine in the cupcakes.  This is a simple recipe - and you don't even need a mixer, just a whisk and a bowl. 

They smell great while they are baking, and once out of the oven you poke some holes into the cupcakes and then pour some root beer on top of each cupcake to soak it up.  Let them cool fully in the tins and then it's time for the glaze.  More root beer and some confectioners sugar and you are good to go.  Drizzle a little of each on top and let set. 

yum
The glaze also goes into all the holes you poked earlier, so you end up with a thin layer of glaze on top.  Then you can eat these amazingly moist cupcakes.  Taste Tester approved :)

Chocolate Root Beer Cupcakes
makes about 30

1 stick butter
2 cups all purpose flour
2 1/2 cups root beer
1 cup unsweetened cocoa powder
2 oz bittersweet chocolate, chopped
1 cup granulated sugar
1/2 cup packed dark brown sugar
1 1/4 tsp baking soda
1/2 tsp allspice
1 tsp salt, plus a pinch
3 large eggs, beaten
2 1/2 cups confectioners sugar
1 tsp vanilla extract

  1. Preheat oven to 325 degrees.  Line standard cupcake tins with paper liners and set aside.  Heat 2 cups root beer, cocoa powder, chocolate and butter in a large saucepan over medium heat until the butter melts.  Add the granulated and brown sugars and whisk until dissolved.  Remove from the heat and let cool.
  2. Combine the flour, baking soda, allspice and salt in a small bowl.  Whisk the eggs into the root beer mixture, then gently fold in the dry ingredients (the batter will be slightly lumpy).
  3. Fill each cupcake 2/3 way full and bake for about 20 minutes, check with a toothpick inserted into center of cupcake comes out clean.  Transfer tins to cooling rack.  Gently poke cupcakes all over and pour 1/4 cup root beer over the cupcakes; let cool in the tins.  Once completely cooled, take out of tins.
  4. Make the glaze: Whisk the remaining 1/4 cup root beer, a pinch of salt, confectioners sugar and vanilla in a bowl until smooth.  Drizzle some over each cupcake.

Monday, September 26, 2011

Baking with Miss M

Yesterday I got the chance to have a helper - and it was adorable.  Miss M was so excited to bake cookies together, I was too.  I haven't had a helper - and it was tons of fun.  She got to pick out what cookie she wanted to make - I found out that she is a lover of chocolate.  This was going to be easy :) We ended up making our own creation by taking two cookies and making them into one.  We get going on the batter, Miss M helping out every step of the way.  We measure it all out, and slowly the batter starts to come together. Now comes the fun part, scooping it out (and tasting the batter). 

Miss M scooping away
After we scooped out our first sheet, she said something was missing - sprinkles.

sprinkles!
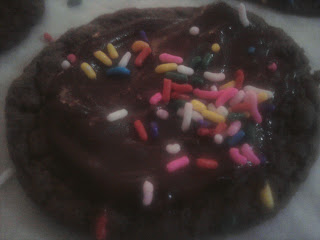
Excellent addition if you ask me.  I love a festive cookie.  Into the oven they go to bake.  Then once they were all done, time to frost them......with more chocolate :)  What else right?!  Miss M wanted sprinkles in the frosting as well as on top of the cookie.  Excellent idea. 

I frosted, she put the sprinkles on
Now came the fun part, eating one! Well, we all had snacked on some that weren't frosted before.  But now it was time to eat them once they were all finished. 

very tasty cookie
We all loved them! Excellent job Miss M! Can't wait to bake with you again! :)

Miss M's Cookies
makes about 30 cookies

1 1/2 cups all purpose flour
1 cup semi-sweet chocolate chips, melted and cooled
1 tsp baking soda
1/2 cup butter, room temperature
1/2 cup sugar
1/2 cup packed brown sugar
1 egg
1 tbsp milk
1 tsp vanilla extract
Frosting:
1 cup semi-sweet chocolate chips
4 tbsp butter
sprinkles

  1. Preheat oven to 350 degrees.  Line a baking sheet with parchment paper or Silpats.  In a large bowl, beat butter and both sugars with an electric mixer until combined, scraping down sides of bowl as needed.  Add egg, milk and vanilla extract, mix until combined.  Add flour and baking soda, mix until combined.  Add in cooled chocolate and mix until batter is all one color.
  2. Scoop out 1 tsp of dough onto baking sheet and top each cookie with sprinkles.  Bake for 8 minutes, rotating sheets halfway through.  Let cool on wire rack. Frost cookies when completely cooled.
  3. Frosting:  Melt chocolate and butter in microwave safe bowl, 30 seconds at a time.  Mix well until combined and then add sprinkles into the frosting.  Frost each cookie and then add sprinkles on top as well. 

Saturday, September 24, 2011

Chocolate Chip Cookie Cupcakes

I love these cupcakes.  Super easy and extremely tasty.  And who wouldn't want a chocolate chip cookie in the form of a cupcake?!  These wont last long when you make them.  You can use chocolate chunks, chocolate chips, or mini chocolate chips in these - all work great.  Just make sure to dredge them in flour before you add them to the batter so they don't all sink to the bottom. 

This comes together quickly like a regular cookie does and before you know it, you're scooping the dough out into the cupcake tins and baking them off.  I do suggest letting them cool at least an hour before you eat them.  If you don't wait, the cupcake sticks to the liner and its a giant mess - yes, my family didn't wait the first time I made these...it was a lesson learned.  There was a lot of picking pieces off of the liners.  I suggest waiting until they are cooled.  :)


delicious
You will make these a lot after the first time.  If you want, you can even frost them and make them a true cupcake. I used dark chocolate frosting on them once and they were amazing.  Tasty naked or with frosting. 

Chocolate Chip Cookie Cupcakes
makes 24


 1 1/2 cups all purpose flour
3/4 tsp baking powder
1/2 tsp salt
1 cup (2 sticks) butter, room temperature
3/4 cup sugar
3/4 cup packed light-brown sugar
3 large eggs
1 tsp vanilla extract
1 cup milk
8 oz semisweet chocolate - chips or chunks

  1. Preheat oven to 375 degrees.  Line standard muffin tins with paper liners.  Whisk together flour, baking powder and salt.
  2. With an electric mixer on medium-high speed, cream butter and both sugars until pale and fluffy.  Add eggs, one at a time, beating until each is incorporated, scraping down sides of bowl as needed.  Beat in vanilla.  Reduce speed to low.  Add flour mixture in two batches, alternating with the milk, and beating until combined after each.  Stir in chocolate.
  3. Fill each lined cup with 1/4 cup batter.  Bake, rotating tins halfway through, until pale golden and a cake tester inserted in centers comes out clean, about 20 minutes.  Transfer tins to wire racks to cool completely before removing cupcakes. 

Friday, September 23, 2011

Nutmeg Softies

If you want your house to smell like fall, these cookies are the ones to make.  My house smelled amazing when I made these. And if you are a fan of nutmeg, then these are the cookies for you.  And to make things even better, this cookie is extremely easy to make.  The batter for this cakey cookie comes together quickly, and then you let it chill in the fridge for at least 2 hours.  The recipe said to roll it out and cut it into shapes, but I didn't feel like doing that.  So I just scooped it out with my cookie scoop and it worked out great.  I highly suggest this way.  But if you want to roll it out and cut the cookies into shapes, go for it.  :)  I wasn't in the mood to do that yesterday, so I just scooped them out and baked them off. 

I wasn't prepared for the amazing smell these would have baking.  When I went to rotate the cookie sheets the first time, I was amazed.  Quickly my whole house smelled like fall and I was loving it.  Then when they came out and cooled a little, I had to try one.  Delicious.  And I knew Ween would love them since they're cakey cookies.

yummies
I was a little worried handing these out since they are a little bit different for a cookie, but everyone loved them.  I highly suggest these if you are looking for something different or a good fall cookie. 

Nutmeg Softies
makes about 32 cookies

1/2 cup butter
1/2 cup shortening
1 1/2 cups sugar
1 tsp baking soda
1 tsp ground nutmeg
1/2 tsp salt
1 cup dairy sour cream
1 egg
1 tsp vanilla
4 cups all purpose flour

  1. In a large mixing bowl beat butter and shortening with an electric mixer on medium-high speed for 30 seconds.  Add sugar, baking soda, nutmeg and salt.  Beat until combined, scraping sides of bowl occasionally.  Beat in sour cream, egg and vanilla until combined.  Add in flour and beat until combined (dough will be sticky).  Divide dough into 3 equal portions.  Cover and chill dough about 2 hours or until easy to handle. 
  2. Preheat oven to 350 degrees.  Line cookie sheets with parchment paper or Silpats.  On a lightly floured surface, roll one portion of the dough at a time until 1/4" thick.  Using a floured 3" cookie cutter, cut into desired shapes.  Place 1" apart on prepared cookie sheet. 
  3. Bake for 10 minutes or until edges are firm and bottoms are golden.  Transfer cookies to a wire rack and let cool.

Thursday, September 22, 2011

Hidden Surprise Cookies

I saw these cookies and my first thought was "Who doesn't like chocolate in the middle of their cookie?"  An almond flavored cookie with a chocolate filling inside of it - I'm all over this one.  I mean look at these.......


surprise! there's chocolate inside :)
......and they are great warm out of the oven or cooled completely.  The dough is extremely easy and comes together quickly.  At the end you take out part of the dough and add cocoa powder to it to make the chocolate middle.  Once that is all ready to go, time to roll the chocolate dough into balls.  Then you take the regular dough and surround the chocolate dough.

pre-wrapped cookie
Make sure no chocolate is poking out anywhere.  Once you have a sheet full of these bad boys, into the oven they go.  And then you get this.....

pretty :)
......they puff up and don't spread out much so you can fit a lot on a sheet.  Ween came home first and had some - loved them!  Loved that it was an almond cookie with chocolate in the middle.  I took some to Jon last night and he was too funny.  He said they looked like a Snickerdoodle...and then ate one and was like oh there's chocolate in the middle!  Then it took him a minute to narrow it down to almond extract in the cookies, but he is a huge fan of these.  He took away any doubt I had about these cookies not being good. 

Hidden Surprise Cookies
makes about 30

1/2 cup butter, room temp
1/4 cup shortening
1 cup sugar
1/2 tsp baking powder
1/2 tsp salt
1 egg
1 egg yolks
2 tsp vanilla extract
2 1/2 cups all purpose flour
1/3 cup powdered sugar
2 tbsp cocoa powder
1 tbsp melted butter
1/4 tsp almond extract

  1. Preheat oven to 375 degrees.  Line cookie sheets with parchment paper or Silpats.  In a large mixing bowl beat butter and shortening with an electric mixer on medium-high speed for 30 seconds.  Add granulated sugar, baking powder, and salt.  Beat until combined, scraping down sides of bowl as needed.  Beat in egg, egg yolks and vanilla until combined.  Add in flour and beat until combined. 
  2. Transfer 3/4 cup of the dough to a small bowl.  Add powdered sugar, cocoa powder and melted butter.  Beat until combined.  Shape chocolate dough into 1" balls.
  3. Beat almond extract into remaining dough.  Mold about 1 tbsp of almond-flavor dough around each chocolate ball.  Roll gently to make a smooth, round ball.  Place balls 2" apart on cookie sheet.
  4. Bake for 10-11 minutes or until bottoms are lightly browned.  Cool on cookie sheet for 1 minute.  Transfer cookies to a wire rack and let cool. 

Wednesday, September 21, 2011

Frosted Butterscotch Cookies

The warm weather has left and it's now time for fall baking.  Things with pumpkin and spices will soon be here - and I can't wait.  This weekend I'm going to make Cider Doughnuts with fresh cider.....very excited.  So in honor of the transition of the seasons, I thought this cookie was a good way to segway into the colder weather.  This cookie is very similar to the Almond Sweets Cookie....and delicious.


yum yum yum
An extremely easy cookie that is sure to please everyone.  These cakelike cookies come together quickly and bake off nicely.  Before you know it, time to frost them.  And the frosting is the best part of these - a brown butter frosting. 

festive sprinkles too :)
I dropped some of these off to one of my taste testers who isn't a fan of chocolate (she got no amazing cupcakes) and I had no clue that she loved butterscotch.  Points to me :)  She was extremely happy to get these delivered to her.  Perfect fall cookie to make. 

Frosted Butterscotch Cookies
makes about 60

2 1/2 cups all purpose flour
1 tsp baking soda
1/2 tsp baking powder
1/2 tsp salt
1 1/2 cups packed brown sugar
1/2 cup shortening
2 eggs
1 tsp vanilla
1 cup sour cream
Browned Butter Frosting

  1. Line cookie sheets with parchment paper or Silpats.  Preheat oven to 375 degrees.  In a bowl, stir together flour, baking soda, baking powder and salt; set aside flour mixture.
  2. In a large mixing bowl beat brown sugar and shortening with an electric mixer on medium-high speed for 30 seconds.  Add eggs and vanilla.  Beat until combined, scraping sides of bowl occasionally.  Alternately add flour mixture and sour cream to egg mixture, beating well after each addition.
  3. Drop dough by rounded teaspoons 2" apart onto prepared cookie sheets.  Bake for 10-12 minutes or until edges are lightly browned.  Transfer cookies to wire rack and let cool. Frost with Browned Butter Frosting and let dry.  (Optional: top with festive sprinkles)
Browned Butter Frosting:  In a medium heavy saucepan heat and stir 1 stick of butter over medium-low heat until golden brown (do not scorch).  Remove from heat.  Stir in 3 1/2 cups sifted powdered sugar, 5 tsp boiling water and 1 1/2 tsp vanilla.  Beat to make a smooth, spreadable frosting.  Immediately frost cookies. (If frosting gets stiff, add a small amount of boiling water and stir until smooth).

Tuesday, September 20, 2011

Chocolate Salted-Caramel Mini Cupcakes

I'm going to start this post off by saying that these are AMAZING!  Seriously - amazing.  They take a lot of time and effort, but soooo worth it.  Before making these, I wasn't too sure about the chocolate cake with chocolate frosting - I thought it was going to be too overpowering....I was so wrong.  The caramel that's in the middle of this cupcake totally changes the taste of everything and makes it delicious and not overpowered by chocolate.  Points to Martha Stewart for putting this recipe out there.  It is now my new favorite.  I didn't really have a favorite cupcake before.  But as I took my first bite of one I'm pretty sure some expletives formed in my head about how good these really are.  I mean look at this.......

rich and delicious
......it's amazing.  Set aside some time for this one - it's a lot of steps.  And the fact that I only have 1 mini cupcake pan didn't help me either.  And I think that if this was made into larger, regular size cupcakes they would be too rich so I would stick with the minis.

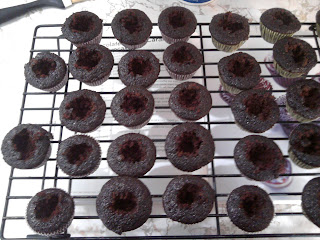
Once all my cupcakes were baked off and cooled, I cut holes into each of them - make sure that you don't cut all the way to the bottom.  You want to leave a layer of cake to support the caramel. 

don't worry if they aren't pretty,
no one is going to see this part
Once this step is done, time to make the caramel.   This being my second time making caramel, I still was amazed and scared by it - I definitely don't want to get burned by hot sugar.  Once it's all ready, I took a spoon and filled each cupcake with the warm caramel.  The caramel will cool off because this takes a while, gently reheating it is allowed and ok.  I had to reheat mine twice.  And I had some left over so I filled up some candy molds to use it all up.


caramel pops :)
 Once all filled, top off with some sea salt and get going on the frosting.  Best, richest chocolate frosting ever.  All ready to go, I put it in my pastry gun and top away.   And somehow now I can't unscrew the top half of my gun - so it's just sitting by my sink, full of the remains of chocolate frosting - waiting to be cleaned.  Anyone have any suggestions to unstick it?  None of us can unscrew it and it's driving me crazy.  Back to the cupcakes - once they are all frosted, sprinkle a little of sea salt on top of each cupcake and you are good to go. 

adorable
Then you are good to go! Eat them! They are so worth all this work.  Heays ate one and while she was eating it she looked at me and said that these are amazing....and she was sad that I said to bring in the tupperware full of them on the counter this morning - she wanted those for us. 

Chocolate Salted-Caramel Mini Cupcakes
makes about 56 minis

1 1/2 cups all purpose flour
3/4 cup unsweetened cocoa powder
1 1/2 cups sugar
1 1/2 tsp baking soda
3/4 tsp baking powder
3/4 tsp salt
2 large eggs
3/4 cup buttermilk
3 tbsp vegetable oil
1 tsp vanilla extract
3/4 cup warm water
Salted Caramel Filling
Dark Chocolate Frosting
Sea Salt for garnish

  1. Preheat oven to 350 degrees.  Line mini muffin tins with paper liners.  In a mixing bowl, whisk together flour, cocoa, sugar, baking soda, baking powder and salt.  Add eggs, buttermilk, oil, vanilla and the water.  With an electric mixer on low speed, beat until smooth and combined, scraping down sides of bowl as needed. 
  2. Divide batter evenly among lined cups, filling each about two-thirds full.  Bake, rotating tins halfway through, until cake tester comes out clean, about 15 minutes.  Transfer tins to wire racks to cool 10 minutes; turn out cupcakes onto racks and cool completely. 
  3. Use a paring knife to cut a cone-shaped piece (about 1/2" deep) from the center of each cupcake (discard pieces).  Spoon 1-2 tsps warm filling into each hollowed-out cupcake.  Sprinkle a pinch of sea salt over filling.
  4. Fill a pastry bag with a medium open-star tip with frosting.  Pipe frosting onto each cupcake, swirling tip and releasing as you pull up to form a peak.  Garnish each cupcake with a pinch of sea salt.  Store at room temperature (do not refrigerate).


Salted Caramel Filling
makes about 2 cups

2 1/2 cups sugar
2/3 cup water
1 tbsp light corn syrup
3/4 cup heavy cream
2 1/2 tsp sea salt

Heat sugar with the water and corn syrup in a heavy saucepan over high, stirring occasionally, until syrup is clear; clip a candy thermometer to side of pan.  Stop stirring, and cook until syrup comes to a boil, washing down sides of pan with a wet pastry brush as needed.  Boil, gently swirling pan occasionally, until mixture is caramelized and just reaches 360 degrees F.  Remove from heat; slowly pour in cream (mixture will spatter) and stir with a wooden spoon until smooth.  Stir in sea salt.  Use immediately; if at any time caramel begins to harden, reheat gently until pourable.

Dark Chocolate Frosting
makes about 5 cups

1/2 cup plus 1 tbsp unsweetened cocoa powder
1/2 cup plus 1 tbsp boiling water
2 1/4 cups (4 1/2 sticks) butter, room temp
3/4 cup confectioners sugar
1/4 tsp salt
1 1/2 lbs semi sweet chocolate, melted and cooled

Combine cocoa and the boiling water, stirring until cocoa has dissolved.  With an electric mixer on medium-high speed, beat butter, confectioners sugar and salt until pale and fluffy.  Reduce speed to low.  Add melted and cooled chocolate, beating until combined and scraping down sides of bowl as needed.  Beat in the cocoa mixture.  If not using immediately, frosting can be refrigerated up to 5 days, or frozen up to 1 month, in an airtight container.  Before using, bring to room temperature, and beat on low speed until smooth again.

Monday, September 19, 2011

Caramel-Chocolate Clusters

I saw this and had to make it.  We all know my love affair with caramel so anything with it in it I'm going to make.  And this is the easiest, quickest cookie ever!  You can use whatever cereal you have on hand.  The recipe called for honey graham cereal and all I had on hand was some Rice Krispies - so that's what went in it.  All that's in this is caramel, chocolate chips and the cereal.  Melt down the caramel with some water and chocolate chips, stir in the cereal and drop tsps of mixture onto parchment paper and let set.  Done - that easy.

oh yeah.....chocolatey and caramely....
and delicious
I didn't have any caramels here (the Kraft kind is what they recommend), so I made my own.  Why not right?!  It's really easy - I will put the recipe for it up when I make chocolate cupcakes with caramel in the middle - oh yes I'm going there.....I just need to find some mini cupcake liners and lately no one has them.  Caramel is extremely easy to make, just a little dangerous because it gets really hot.  Like 360 degrees hot.  And being burned by sugar is not high on my list of things.  I get out my candy thermometer (Thanks to Linda and Bax for this one - this baby is getting lots of use this week) and get my caramel going.

I love my candy thermometer
Once it was at 360 degrees, time to add some cream and this part is scary.  It boils up and spits so if you make your own caramel, be careful.  But then it turns into this

hello friend
Let me tell you the smell of this in my house was amazing.  Ween commented on it, and caramel is not one of her favorite things.  If you do make your own instead of going the store bought route, you will want to double the amount of chocolate chips and cereal you use since the caramel amount is larger.  And let's face it, these things are that good you wont mind. 

Add the caramel to the cereal and chocolate chips and stir until it's well combined and coated then scoop out onto parchment paper and let set.  Easiest cookie ever. 

Caramel-Chocolate Clusters
makes about 28 cookies

12 vanilla caramels, unwrapped
1/2 cup semi sweet chocolate chips
2 tbsp water
2 cups honey graham cereal, slightly crushed

  1. Line a cookie sheet with waxed paper; set aside.  In a medium heavy saucepan combine caramels, chocolate pieces and water.  Heat and stir over low heat until caramels melt.  Remove saucepan from heat.  Stir in cereal. 
  2. Working quickly, drop the mixture from a teaspoon onto prepared cookie sheet.  Let stand until firm. 

Saturday, September 17, 2011

Some not so good news

I had my doctors appointment yesterday to follow up on my progress since surgery.  I went in with a positive attitude and took the 2 hour drive to see my doctor.  I got there and he was running late, not a big deal to me since most doctors don't run on time at all anymore, and I sat there and caught up on my magazines and newspapers throughout the office.  2 hours later I finally get called back (the staff at this office is amazing) and patiently wait to see my doctor.  He comes in and we talk a little bit and then we start with the tests.  These I enjoy and hate.  It's a little plastic stick in different thickness/strength and I close my eyes while he pokes each finger and I saw which finger he's touching.  I get excited and happy when I can feel anything on my ring or pinky fingers - this means progress.  But during the tests yesterday I couldn't feel anything at all on my pinky finger - with any of the different levels.  :(

Then he proceeds to take out the safety pin and I have to tell him if he's touching my hand with the sharp end or the dull end (eyes closed again on this one).  He jumps around from finger to finger, having me say if it's sharp or dull.  Moments of silence pass and I know that he is probably on my pinky finger and I can't feel anything he's doing.  Silence still going on and he flips my hand over and does the same on the top of the hand....nothing.  Let me tell you, when you are sitting there waiting for your doctor to say something to you, it's scary and heartbreaking.  He tells me to open my eyes and the look on his face is not good.  He goes through my chart and re-reads some things and then says he's not sure why half of my nerve is working and half of it isn't - meaning that why can i feel some things in my ring finger and nothing in my pinky finger.  He says nerves are never a guarantee, that it might be permanent, and that this is now a waiting game. I got an order for more OT to help build up my strength back and I have to go back in a month. 

I leave the office, get in my car and just start to cry, something I didn't want to do in the office.  I hate going to these appointments alone lately, always getting bad news and it's taking it's toll on me. But at the same time I would hate to ask someone in my family to take a day off of work to go with me, and being single right now and having no boyfriend to console me either (lets face it, sometimes there's nothing better than a hug from a man who cares about you) means I go to these things alone.  I text my family and some close friends and post on Facebook for those friends that don't live close to me who are always checking in on me, and I start my long drive home and as always get stuck in traffic.  One of my best friends calls me and I answer and start to cry with her on the phone.  It's so frustrating and heartbreaking at the same time.  The possibility of never feeling my pinky again is really scary and I'm way too young for this to happen to me to be out of the work world for the rest of my life.

When I finally got back to the area I live in, I stopped at my favorite local bar.  I couldn't go home to an empty house.  I had a beer, talked with some people and waited for one of my sisters to text me that they were going home.  People were calling me and texting me while I was at the bar and I couldn't answer....if I did I would start to cry and didn't want to do that again.  But when I got home my mom called and I lost it on the phone with her and started again.  Needless to say, I'm a mess right now.  Trying to wrap my head around things and still trying to hope for the best.  I apologize for a sad, non-baking post. 

Thursday, September 15, 2011

Mocha Cookies

I was in the mood to make some cookies, so I started flipping through my 'Biggest Book of Cookies' and saw this recipe.  One half is a chocolate chip, the other half is coffee, making a mocha cookie.  When I saw that this doesn't need to chill or get rolled or anything like that, I was all over this cookie.  And I must say, they are really tasty!

mmmmm...mocha cookies
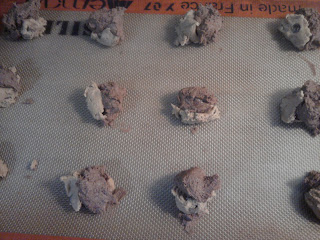
I enjoyed making this cookie.  The dough is extremely easy and then you get to split the dough in half and add chocolate chips to one half and some cocoa powder and cream into the other half.  Then you scoop out about 3/4 tsp of each dough and place side by side on a baking sheet and press together.

I had fun smooshing the
doughs together
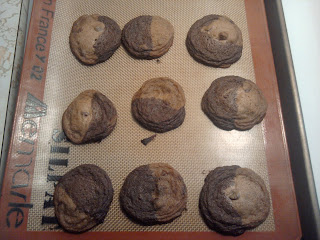
Off into the oven they go to bake, and they don't take long.  8 minutes later you have this.......

yum
......I thought that maybe they could use a mocha glaze.  The recipe doesn't call for one, but I wouldn't be sure if it would need it until I tried one when they were cooled.  An hour later I take a bite of one.  They are really good!! But for some reason I was obsessed with making a mocha glaze for these, so that's what I did.  And wouldn't you know it when I put that glaze in a plastic bag and went to top each cookie the bag broke on me - again!  This time I quickly got out my pastry gun and finished frosting the cookies.  Lesson learned - if you use cheap plastic bags (I have store brand for the small bags), don't use them as a pastry bag.  The things I do so I don't have to wash another dish sometimes.  I love these cookies!  I will absoluetly make them again!  With or without a mocha glaze, they are delicious.  :)

Mocha Cookies
makes about 48 cookies

2 tbsp insant coffee crystals
3 tbsp light cream or half and half
1 cup butter, room temperature
2/3 cup sugar
2/3 cup packed brown sugar
1 tsp baking soda
1/4 tsp salt
1 egg
1 tsp vanilla extract
2 1/4 cups all purpose flour
1/4 cup cocoa powder
1/2 cup semisweet chocolate chips

  1. Preheat oven to 375 degrees.  Line baking sheets with parchment paper or Silpats.  In a small bowl stir together instant coffee crystals and 1 tbsp of light cream until crystals dissolve; set aside.
  2. In a large mixing bowl beat butter with an electric mixer on medium-high speed for 30 seconds.  Add granulated sugar, brown sugar, baking soda and salt.  Beat until combined, scraping sides of bowl occasionally.  Beat in the coffee mixture, egg and vanilla until combined.  Beat in flour until combined.
  3. Divide dough in half.  Stir the remaining 2 tbsps light cream and cocoa powder into one portion and stir chocolate chips into the remaining plain dough portion.  Spoon a scant teaspoon of each dough sidge by side onto prepared cookie sheets.  Press doughs together. 
  4. Bake for 8-9 minutes or until just set.  Cool on cookie sheet for 1 minute.  Transfer cookies to a wire rack and let cool.

Wednesday, September 14, 2011

Snickerdoodle Cupcakes

I was out Saturday night with Heay's to go see her friends band play - and somehow by the end of the night I had turned into the bands pastry chef.  And when I was asking everyone what they liked, it turned out there was a Snickerdoodle lover in the band.  My first thought was these cupcakes (from my Martha Stewart Cupcakes) since I had a ton of egg whites sitting in my fridge from making pastry cream.  If you love Snickerdoodles, then these cupcakes are for you!  They taste exactly like the cookie, but in cupcake form with a marshmallow topping.  They are really tasty.  And if you are adventurous, you could make this in a cake.  And after my catastrophe Monday, I really needed something easy to make that I knew wouldn't give me any trouble. 

hello there
The batter is extremely easy - the hardest part about the whole recipe is the frosting.  Once the cupcakes are baked and cooled, it's frosting time.  This is a marshmallow frosting - my suggestion is to skip the pastry bag.  It's extremely sticky.  The best thing to use is a gallon ziplock bag.  Put all of the frosting in there and snip a corner of the bag and squeeze away.  This one is easy to pipe.  All you have to do is squeeze and then lift up to get the peaks on them.  Personally, I find this part fun.  Once they are all piped, sprinkle with some cinnamon-sugar and you are good to go! 

Tuesday is "treat day" for some of my taste testers, so I go to my regular drop offs and added a new one (which I'm excited about).  I get to my last stop and I was a little later than I usually am, and I find out that everyone has been asking one of the bar tenders if I had been in yet.  He kept telling them no I hadn't made it in yet.  They were excited to see me when I walked in.  Learning this made me flash back to my days at massage school and having grown men follow my friends and I around if I had tupperware full of treats - it made me giggle that's for sure.  I didn't realize that so many of them are fans there. 

Snickerdoodle Cupcakes
makes 28

1 1/2 cups all purpose flour
1 1/2 cups cake flour (not self-rising)
1 tbsp baking powder
1/2 tsp salt
1 tbsp cinnamon, plus 1/2 tsp for dusting
1 cup (2 sticks) butter, room temperature
1 3/4 cups sugar, plus 2 tbsp for dusting
4 large eggs, room temp
2 tsp vanilla extract
1 1/4 cups milk
Seven Minute Frosting

  1. Preheat oven to 350 degrees.  Line standard muffin tins with paper liners.  Sift together both flours, baking powder, salt and 1 tbsp cinnamon.
  2. With an electric mixer on medium-high speed, cream butter and sugar until pale and fluffy.  Add eggs, one at a time, beating until each is incorporated, scraping down sides of bowl as needed.  Beat in vanilla.  Reduce speed to low.  Add flour mixture in three batches, alternating with two additions of milk, and beating until combined after each.
  3. Divide batter evenly among lined cups, filling each three-quaters full.  Bake, rotating tins halfway through, until a cake tester inserted in centers comes out clean, about 20 minutes.  Transfer tins to wire racks to cool completely before removing cupcakes.  Cupcakes can be stored up to 2 days at room temperature, or frozen up to 2 months, in airtight containers. 
  4. To finish, combine remaining 1/2 tsp cinnamon and 2 tbsp sugar.  Using a pastry bag fitted with a large plain tip, pipe frosting on each cupcake: Hold bag over cupcake with tip just above the top, and squeeze to create a dome of frosting, then release pressure and pull up to form a peak.  Using a small, fine seive, dust peaks with cinnamon-sugar.  Cupcakes are best eaten the day they are frosted; keep at room temperature until ready to serve.


Seven Minute Frosting
makes about 8 cups

1 1/2 cups plus 2 tbsp sugar
2/3 cup water
2 tbsp light corn syrup
6 large egg whites, room temperature

  1. Combine 1 1/2 cups sugar with the water and corn syrup in a small saucepan; clip a candy thermometer to the side of the pan.  Bring to a boil over medium heat, stirring occasionally, until sugar dissolves.  Continue boiling, without stirring, until syrup reaches 230 degrees F.
  2. Meanwhile, in the bowl of a standing electric mixer fitted with the whisk attachment, whisk egg whites on medium-high speed until soft peaks form.  With mixer running, add remaining 2 tbsp sugar, beating to combine.
  3. As soon as sugar syrup reaches 230 degrees, remove from heat.  With mixer on medium-low speed, pour syrup down side of bowl in a slow, steady stream.  Raise speed to medium-high; whisk until mixture is completely cool (test by touching the bottom of the bowl) and stiff (but not dry) peaks form, about 7 minutes.  Use immediately.  

Tuesday, September 13, 2011

Cream Puffs

I decided that I had now mastered Pastry Cream, that I was going to make some cream puffs.  Well wouldn't you know it yesterday was an interesting day for me.  Making these isn't hard, just very labor intensive.  Lots of steps making some Tart Dough, Pate A Choux and Pastry Cream.  I enjoyed making each step - and I did it twice.  Yes - epic fail!  And funnily enough I had something go wrong each time I made them.  But I'm getting ahead of myself.  Let's start at the beginning......

I make the Tart Dough first since that needs to chill the longest.  Easy enough and shortly after I started it's in the fridge.  Once it's chilled enough, I start on the Pate A Choux.  This was fun.  And super easy.  So once it's all ready into the pastry bag it goes and I pipe away a lot of small circles.

so cute
Into the freezer they go.  After 30 minutes, I cut out the Tart Dough and put a smaller disc on top of each puff. 

precious
Back into the freezer they go.  Then time to bake.  They bake nicely and before I know it they are done......but once they have been out of the oven for a while, I noticed something - they've deflated.  :(  Totally not a puff at all.

sad looking puffs
My first thought was that once I fill them with cream they will be fine.  I make the pastry cream, half regular and half chocolate and let it set in the fridge.  Then hours later, I fill each puff.  This didn't go so well.  It ended up a giant mess of the puffs not filling with cream and holes being punched through all of them.  I tossed them into a tupperware container......these will be eaten - just by my sisters and myself.  I take a break and decide that I will make these again - especially since I still have enough pastry cream to fill another batch of puffs. 

A couple of hours later I decide to start again.  I make some new Tart Dough, go run some errands, come back and start on a new Pate A Choux.  This time when I pipe the puffs I had noticed in the cookbook that she had built them up as she piped - no where did it mention this in the directions -that you need to start in the center and work out and then up - that was my mistake with the first batch and why they didn't puff up right.  So away I went piping little discs.  Into the freezer again and then time to roll out the Tart Dough.  Cut tons of discs and place on top of each disc and into the freezer.  Something was wrong with the Tart Dough - it didn't come together right and was crumbly.  I was hoping that it would bake ok.   After a short stint in the freezer - time to bake.  They puffed up great!!  I was so happy.  But the tart dough discs didn't crumble like they did in the first batch, instead they stayed in the shape of a disc on top.  :(  I didn't really care at this point, I was going to fill these bad boys. 

I already had the remaining pastry creams in plastic ziplock bags so I decided that if I just cut a tip on one of the corners and stuck one of the tips from my pastry bag in there it would work.  It worked great for the vanilla puffs.

some got a little over filled
When I got to the chocolate - all hell broke loose.  I did the same thing with the bag and inserted the pastry bag tip no problem and started to fill.  Then, all of the sudden, I punctured the bag with my pinky finger because I couldn't tell how hard I was squeezing with it and was digging my nail into the bag.  Awesome.  I transfered everything to another plastic bag and started to fill again.  And then I did it again.  Way to go pinky finger.  At this point I have chocolate pastry cream all over my hands, all over the kitchen counter and I'm fighting back tears trying not to have a breakdown.  Heays was in the kitchen with me and was trying to calm me down.  I had 5 puffs left!  I just wanted to fill the damn things!  Into my pastry gun they go and I finish filling them all. 

I'm showing you the good half
before I broke the bags and chocolate
got everywhere
Frustrated, I threw everything into the sink and washed my hands and arms up (yes - it was all over my arms too from reaching into the plastic bag to get the pastry bag tip).  I needed a drink.

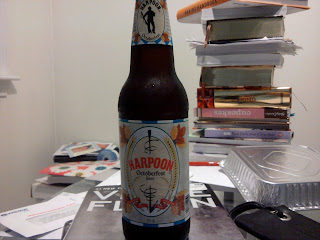
mmmm....beer
Let me tell you - that beer was delicious.  I might of had more than one too.  I put all the cream puffs in tins and stuck them in the fridge and went to work on cleaning up the disaster area that is better known as my kitchen sink and countertop.  I sat down and watched the Patriots football game, had some beer and some flat cream puffs. 

My sisters are loving the flat cream puffs - if I had it my way I would throw them out - every time I open the fridge they taunt me, showing my failure.  I can't wait until they are all gone.  But I am delivering the good ones today.  And I am going to make these again - and damnit they will be perfect!!

Friday, September 9, 2011

The un-named, amazing cookie

I was looking at my daily email update from My Baking Addiction and saw that she did a recipe for Turtle Cookies.  I went and looked at it and printed it out.  I have never been a fan of nuts in my desserts - ever.  When I go out and I see that a dessert has nuts I always ask for it without them, and if the nuts are in the dessert itself, I have to make another selection.  I don't know why this is, it's always baffled me - I hate Peanut M&M's, Snickers Bars, anything like that - I just can't do it.  So I will never make anything that has nuts in it.  Unless it's for my dad - he loves nuts in his desserts (he's the only one so it doesn't happen a lot).  I printed out the recipe and got to wondering what I could do to fix up this recipe and make it my own.  It's a great recipe to start with - I highly suggest you make it the way it is.  I made a few minor tweaks to make it more in my favor and off the grocery store to get supplies.

I get there and my plan was to get mini Rolo's and some Heath Bar bits for some crunch.  I got the Heath Bar bits not problem, but then I went on a long search for the mini Rolo's.  Now, I don't know about you, but I remember when stores didn't put out holiday items until a couple weeks before the holiday.  Yeah - there's Halloween stuff out already! And has been for weeks!  I remember when you wouldn't see it until the end of September - and now Christmas stuff is out before Thanksgiving!! Something has gone wrong with this if you ask me.  Back to my search for mini Rolo's.......I round the aisle and then I see it - Halloween candy.  Tons of Halloween candy.  I knew that somehow my search would end in vain and I wouldn't be able to find what I needed.  I searched for a good 5 minutes, going over every shelf twice, thinking if that item would work.  But I kept going back to Milk Duds.  Now I love Milk Duds - it's like a Rolo just in a different shape.  It was a little bigger size than what I wanted, and I stood there in the middle of the aisle arguing with myself if they will work or not and should I just get them.  I decide to get them and I leave the store immediately so I don't keep looking for something else to replace the Milk Duds.

I get home and make the dough then put it in the fridge to chill for 24 hours.  The next morning comes and I get to scooping out cookies.  You can make them huge like she does on the web site, or normal size like I did.  It's a lot of dough so it makes a lot of cookies.  Great if you're having a party or get together or need to make something for someone.  Away I go scooping out cookies and baking them off.  The whole time I'm wondering in my head what I'm going to call these things.  I put it out of Facebook to my friends to help me name the cookies.  I got a couple funny ones and a good one - I'm still waiting to hear back from some of my taste testers on their feedback and a name.  And I picked up a new taste tester yesterday - which has me really excited.  I don't know if people think I'm kidding or not when I put it out on Facebook that I need more taste testers - I really honestly mean it.  And when people take me up on it, they are surprised that I actually follow through.  My poor family can't take eating everything all the time.  I bake - a lot - and honestly I give most of it away and keep a couple for my family.  So yes, I'm always looking for taste testers and if you live near me and want to be one, get in touch with me. 

Cookies are done and cooled and I try one.......

oh yeah - delicious
......and I was so happy with how they turned out.  The toffee bits added the crunch that the nuts would of offered so I was happy with that switch.  I pack some up and go off and be treat fairy.  People were so happy for cookies!  And the feedback I got from Heay's coworkers was great.  And one of them said it was the best thing I've ever made - his favorite by far.  Still not sure on the name, but the front runner so far is Candy Sensations.  If you've got a suggestion for a name please let me know! 

Wednesday, September 7, 2011

Boston Cream Pie Cupcakes

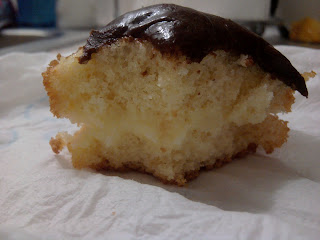
I have been looking at these for years - and I finally made them. When I first got my Martha Stewart Cupcakes Cookbook I wanted to make these....but the pastry cream part scared me off.  I wasn't that confident back then that I could pull it off.  But I am now - and I totally took this recipe on and made it my own.  They are labor intensive - but so worth it.  If you have a lot of time on your hands - I highly suggest making these.  You can skip a step and buy pre-made pastry cream, but I made my own.  And I will include the recipe for everything for you to make it yourself.  But the end product looks like this......

hello deliciousness
.......and they are delicious. 

So I started off by being smart and making my pastry cream the night before I made them, my thought was it was one less thing to worry about in the morning.  So I make the pastry cream and put it in the fridge overnight and don't worry about it at all, until after I've made the cupcakes, got my chocolate ganache glaze going and I take out my pastry cream and see this.....

bad CB
....I take off the plastic wrap - and it's a solid gelled mass.  I overcooked it.  So now I had to start a new pastry cream all over....good thing it doesn't take long.  And I decide to just let my ganache set up and become thick and frosting-like instead of a glaze and stick it in the fridge until I need it.

So away I go cutting all the cupcakes in half......

lots of cupcakes
....and then my pastry cream was ready and I scooped out a little onto each cupcake and sandwiched it.

creamy goodness
So here's the part where you can decide if you want a runny chocolate layer, or a thick chocolate frosting.  If you want the runny layer, then make the ganache after you've put the pastry cream in between the cupcakes.  If you want it thick, then make it before you start to put the pastry cream between all the cupcakes and put it in the fridge to thicken up.  Away I went frosting all the tops with rich heavenly chocolate. 


Into the fridge they go to set for 30 minutes and then you can eat one.....


yummers
I had Heays bring some into work and I played treat fairy and dropped some off to my "regular Tuesday" drop offs.  One feedback from a coworkers of Heays was why did I cut the cupcake in half?!  Why didn't I fill it?  Much easier and less labor intensive.  And when I brought some to one of my friends last night, he asked the same thing - why didn't I fill them instead of cutting them in half.  Next time I make them, I'm so going to do that.  :) 

Boston Cream Pie Cupcakes
Makes 20

6 tbsp unsalted butter
1 1/2 cups all purpose flour
1 1/2 tsp baking powder
1/2 tsp salt
1/2 cup milk
3 large eggs, room temperature
1 cup sugar
1 tsp vanilla extract
Pam cooking spray
Pastry Cream
Chocolate Ganache Glaze

Pastry Cream

4 large egg yolks
1/2 cup sugar
1/4 cup cornstarch
pinch of salt
2 cups milk
1 1/4 tsp vanilla extract

  1. Whisk egg yolks until smooth in a large bowl.  Combine sugar, cornstarch, and salt in a medium saucepan, and heat over medium.  Stirring constantly, gradually add milk in a slow, steady stream, and cook until mixture thickens and begins to bubble, about 5 minutes.
  2. Whisking constantly, slowly pour one third of the milk mixture into egg yolks.  Pour mixture into remaining milk mixture in saucepan.  Cook over medium heat, whisking constantly, until mixture comes to a full boil and is thick enough to hold its shape when lifted with a spoon, 2-4 minutes.  Remove from heat; stir in vanilla.
  3. Strain mixture through a fine sieve into a heatproof bowl.  Cover with parchment paper or plastic wrap, pressing it directly on surface to prevent a skin from forming.  Refrigerate until chilled and firm, at least 2 hours (or up to 2 days).
Cupcakes

  1. Preheat oven to 350 degrees.  Spray standard muffin tins with Pam and set aside.  Whisk together flour, baking powder and salt.  Combine milk and butter in a saucepan; set over very low heat. 
  2. With an electric mixer on high speed, whisk eggs and sugar until fluffy, pale yellow, and thick enough to hold a ribbon on the surface for several seconds when whisk is lifted, about 5 minutes.  Reduce speed to medium.  Gradually add flour mixture, whisking until just incorporated.
  3. Bring milk and butter just to a boil.  With mixer on low speed, add hot-milk mixture to batter in a slow, steady stream; mix until smooth (don't overmix).  Beat in vanilla.
  4. Divide batter evenly among prepared cups, filling each halfway.  Bake, rotating tins halfway through, until cupcakes are golden, about 15 minutes.  Transfer tins to wire racks to cool 10 minutes.  Run a small offset spatula or knife around the edges to loosen; turn out cupcakes onto racks and let cool completely. 
  5. To finish, use a serrate knife (and a gentle sawing motion) to split cupcakes in half horizontally.  Spread about 1 tbsp pastry cream on the bottom half of each cupcake.  Replace top halves.  Spoon about 1 tbsp glaze over each cupcake.  Refrigerate 30 minutes to set. 
Chocolate Ganache Glaze

6 oz semisweet chocolate chips
2/3 cup heavy cream
1 tbsp light corn syrup

  1. Place chocolate in a medium heatproof bowl.  Bring cream and corn syrup just to a simmer in a small saucepan over medium-high heat; pour mixture over chocolate.  Let stand, without stirring, until chocolate begins to melt.
  2. Using a flexible spatula, gently stir in chocolate and cream until totally combined; begin near the center of the bowl and gradually work your way toward the edge, pulling in as much chocolate as possible, until the mixture is smooth and glossy.  Use immediately.
Monday, September 5, 2011

Cinnamon Twists

I had a request for these, from a long time ago - months ago actually - and I'm finally getting to it.  This one does take all day.  It's a lot of waiting for the dough to rise, rolling it out and having it rise again.  But let me tell you  - so worth it.  Very tasty and fun to make.  If you are a fan of cinnamon then you must try these.

delicious glazed goodness
Once the dough was proofed and ready to roll out I got excited.  I love making things for the first time and seeing how they turn out.  I roll it out to a pretty big rectangle and butter the crap out of it (make sure you go right up to the edge - there's no folding edges over in this one).  Once buttered up, time to sprinkle it with cinnamon and brown sugar.


clearly I didn't go to the edges
Let it rest for 6 minutes and then cut it up.  At this point you can make them large or small twists, the decision is yours.  I made small ones (and how the recipe called for it to be cut).  And clearly I can't cut in a straight line (but we already know this fact) since I ended up with some that are big and some that are really small.


all cut up and ready to twist
Now comes the fun part of twisting them.  Once you twist them all - time to let them proof again.  Once they have doubled in size - time to bake! :)


fresh out of the oven
Your house will smell amazing while these are baking.  And you also have the choice to glaze them or leave them naked - delicious either way.  I went for the glazed route since that's what had been requested.  So once cooled, i glazed them all and let them set. 

These are great for breakfast, or for a snack at any time :)  But make sure you set aside a good part of your day to make these - it does take a lot of time, but totally worth it.


Cinnamon Twists
Dough:
1 package active dry yeast
3/4 cup warm water, divided
4-4 1/2 cups all purpose flour
1/4 cup sugar
1 1/2 tsps salt
1/2 cup warm milk
1/4 cup butter, softened
1 egg

Filling:
1/4 cup butter, melted
1/2 cup packed brown sugar
4 tsps cinnamon

Glaze:
3 cups confectioners sugar
5-6 tbsps milk

  1. In a large bowl, dissolve yeast in 1/4 cup warm water.  Let yeast activate.  Add 2 cups flour, sugar, salt, milk, butter, egg, and remaining water.  Beat on medium speed for minutes.  Stir in enough remaining flour to form a soft dough.
  2. Turn onto a floured surface; knead until smooth and elastic, about 6-8 minutes.  Place in a greased bowl, turning once to grease top.  Cover and let rise in a warm place until doubled, about 1 hour.
  3. Punch down dough.  Roll into a 16"x12" rectangle.  Brush with butter.  Combine brown sugar and cinnamon; sprinkle over butter.  Let dough rest for 6 minutes.  Cut lengthwise into three 16"x4" strips.  Cut each strip into sixteen 4"x1" pieces.  Twist and place on greased baking sheets.  Cover and let rise until doubled, about 30 minutes.
  4. Bake at 350 degrees or until golden brown.  Let cool completely and glaze if desired.
  5. Glaze:  Mix together confectioners sugar and milk until smooth.  Dip top of each twist in glaze and place on cooling rack to set.